---
title: "Add new fields to a catalog item template"
slug: "add-new-fields-to-a-catalog-item-template"
abstract: "You can add fields to Commerce items in the catalog by extending the catalog schema or by extending the catalog item template. This topic describes how to add fields to a product in the catalog by modifying the catalog item template in the Content Editor."
---
# Add new fields to a catalog item template
You can add fields to Commerce items such as categories, bundles, variants, and products in the catalog by:
- Extending the catalog schema using the [Composer feature](https://doc.sitecore.com/xp/en/users/100/sitecore-experience-commerce/adding-properties-to-commerce-entities.html) in the Business Tools to create a template. You can then edit the new fields using the Merchandising tool. However, in the Content Editor or the Experience Editor these fields are read-only. When you extend the catalog schema, values you add are shared everywhere the product is associated. For more information, see [Adding properties to Commerce items](https://doc.sitecore.com/xp/en/users/100/sitecore-experience-commerce/adding-properties-to-commerce-entities.html).
> [!note]
> For information on how to extend the catalog schema programmatically, see the [Knowledge Base](https://kb.sitecore.net/articles/083614).
- Extending the catalog item template using the Template Manager. You cannot edit these new fields in the Merchandising tool but you can edit them in the Content Editor and the Experience Editor. When you extend the catalog item template, the values you add are not shared and must be set everywhere the product is associated.
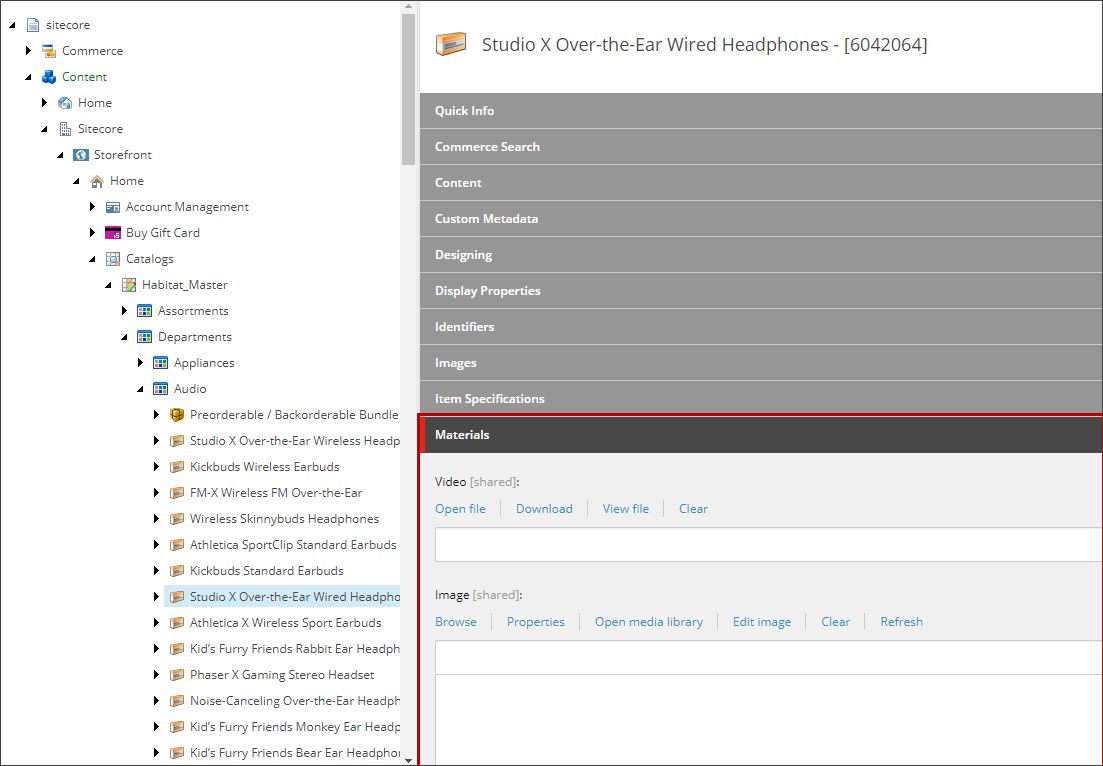
To add fields to a catalog item template, modify the */sitecore/Templates/Project/Sitecore/Commerce Product* template that is created during tenant scaffolding by the Commerce Foundation. By default, there is one template for each Commerce tenant that is shared between all the sites of that tenant. This template inherits from numerous foundational commerce-specific templates including the one provided with the data provider. You can change this template as required.
> [!important]
> Do not modify the */sitecore/Templates/Commerce/Catalog/Commerce Product* template that is provided as part of CE Connect with the data provider.
Add a section with additional fields
As with all Sitecore-specific template fields, data is saved in the *ExternalSettingsComponent* repository in the catalog. However, you cannot edit or view the data in the Commerce Business Tools.
> [!note]
> To avoid cluttering the root tenant folder, save new templates in sub-folders representing sections of other templates.
To add a section with additional fields:
1. Go to *sitecore\\Templates\\Project\\*, right-click the tenant, click **Insert, Template Folder** and, in the **Message** dialog box, enter a name for the folder, for example *Catalog Item Section Templates*, and click **OK**.
2. Right-click the newly created folder, click **Insert, New Template** and, in the **Select name** dialog box, enter a name for the new template, for example, *Product Media Assets*, click **Next**, click **Next** again, and then click **Close**.
3. On the **Builder** tab, click in the first field and enter a name for the new section (for example, *Media Material*).
4. Click in the **Add a new field** box, enter a name for the new field (for example, *Video*) and from the type list select the item type (for example, *File*).
5. Click in the **Add new field** box, enter a name for the new field (for example, *Image*) and from the type list select the item type (for example, *Image*).
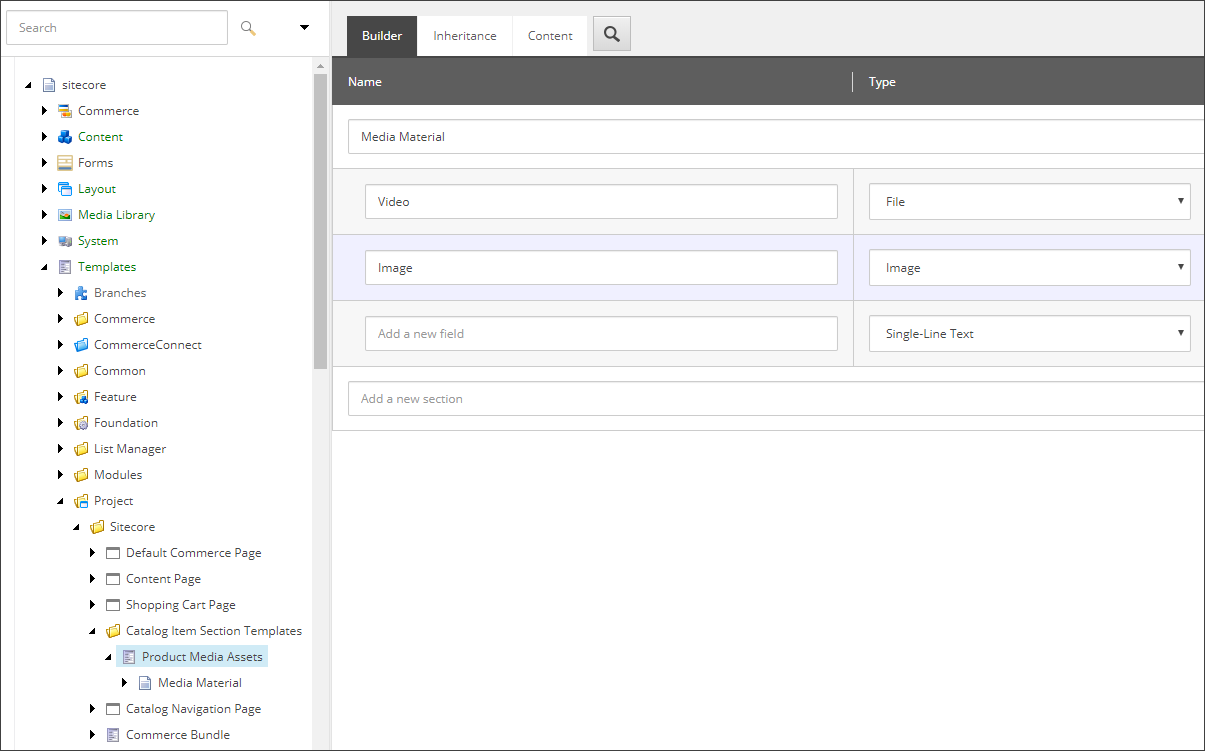
6. On the ribbon, click **Save**.
7. In the Content Editor, go to *sitecore/Templates/Commerce/Catalog* and select the template that you want to add the new section and fields to, for example *Commerce Product*.
> [!note]
> By adding a new base template to the tenant-based Commerce Product template, the changes only affect sites under the tenant. For the changes to affect all tenants and sites, you must add the new base template to the CE Connect provided Commerce Product template.
8. On the **Content** tab, in the **Data** section, in the **Base template** list, go to *Templates\\Project\\\\* and double-click the newly created template *Product Media Assets* to move it to the **Selected** list.
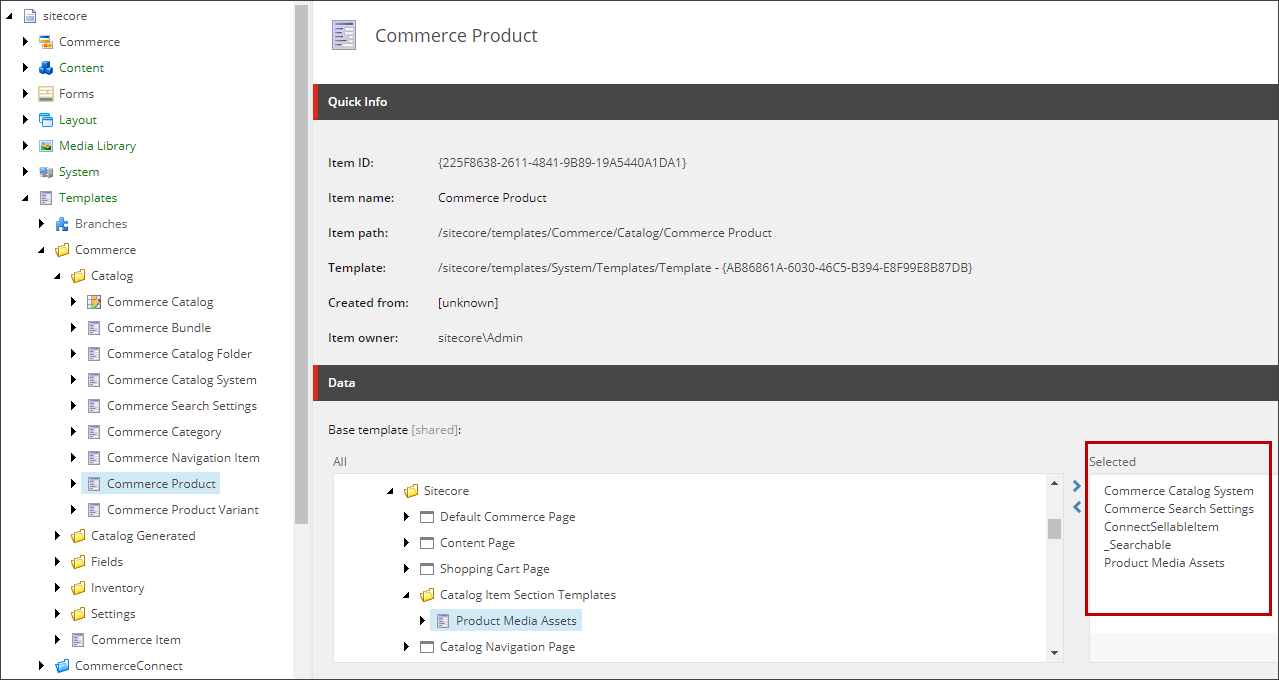
9. On the ribbon, click **Save**.
Add values to the new fields
If a product is available in two categories, for example, you must add values to the new fields for this product in both categories. For example, if the *Studio X Over-the-Ear Wireless Headphones* product is found in both the Audio and the Featured categories and you add values to new fields from the Audio category these values are not automatically carried over to the *Studio X Over-the-Ear Wireless Headphones* product in the Featured category.
To add values to the new fields:
1. In the Content Editor, go to, for example, *sitecore/Content///Home/Catalogs/Habitat_Master/Departments/Audio/* and click, for example, the *Studio X Over-the-Ear Wireless Headphones*.
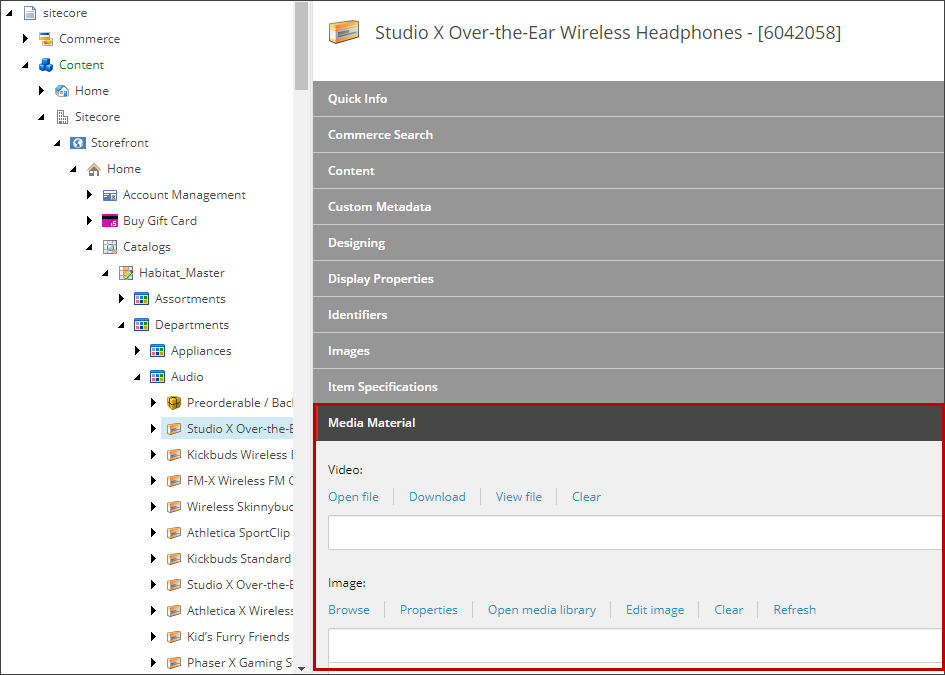
2. In the **Media Materials** section, in the **Videos** field, click **Open File** and click a video file.
3. In the **Image** field, click **Browse** and select an image.
4. On the ribbon, click **Save**.
> [!note]
> You do not have to publish the content, as the data provider exposes the same content both in the content management (CM) instance and on the content delivery (CD) instance, after it is saved.
Render your changes on the storefront
To render your changes on the storefront:
1. In the Content Editor, go to */sitecore/Content///Presentation/Rendering Variants/Page Content*, right-click **Page Content**, click **Insert, Variant Definition** and, in the **Message** dialog box, enter a name for example *Materials*, and click **OK**.
2. Right-click the newly created variant definition, click **Insert, Response Image**, enter a name, click **OK**, and then on the ribbon menu click **Save**.
3. Select the Responsive Image sub-item and, on the **Content** tab, change the **Field** name value from *Responsive Image* to *Image*, which is the name of the new image field that was created, and click **Save**.
4. In the Content Editor, go to */sitecore/Content///Presentation/Partial Designs*.
5. Right-click **Default Main Product Page Content** and click **Experience Editor**.
6. In the Experience Editor, in the Toolbox, in the **Page Content** section, click the **Page Content** rendering and drag it onto the page.
7. On the Page Content toolbar, from the Variant list, click the **Materials** variant.
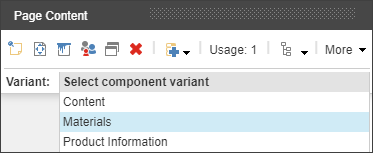
8. On the ribbon, click **Save**.
9. Publish your changes.