---
title: "Walkthrough: Setting up Solr"
slug: "walkthrough--setting-up-solr"
abstract: "Learn how to set up Solr on Sitecore"
---
# Walkthrough: Setting up Solr
This walkthrough describes how to set up Solr for use with Sitecore. It does not cover all configuration options available in Solr: it only documents configuration details specific for using Solr in Sitecore.
> [!note]
> The Solr server that hosts your Content Search cores can be different from the server that hosts your xDB Search Index core.
Follow the instructions in the Solr documentation to install Solr. The Solr website lists resources. The [wiki](http://wiki.apache.org/solr/) hosted there is especially useful.
> [!note]
> You must use a separate core for each index. [This topic](http://wiki.apache.org/solr/CoreAdmin) on the Solr wiki introduces the multiple core concept.
This walkthrough describes how to:
- [Populate an XML schema for Solr](https://doc.sitecore.com/xp/en/developers/92/platform-administration-and-architecture/walkthrough--setting-up-solr.html#UUID-ff181dd3-898d-4ccd-0a18-05fe0a68199a_N1528811068737 "Populate an XML schema for Solr")
- [Generate an XML Schema for Solr](https://doc.sitecore.com/xp/en/developers/92/platform-administration-and-architecture/walkthrough--setting-up-solr.html#UUID-ff181dd3-898d-4ccd-0a18-05fe0a68199a_N1528811088643 "Generate an XML Schema for Solr")
- [Verify that Solr is running correctly](https://doc.sitecore.com/xp/en/developers/92/platform-administration-and-architecture/walkthrough--setting-up-solr.html#UUID-ff181dd3-898d-4ccd-0a18-05fe0a68199a_N1528438014638 "Verify that Solr is running correctly")
- [Configure Sitecore to work with Solr](https://doc.sitecore.com/xp/en/developers/92/platform-administration-and-architecture/walkthrough--setting-up-solr.html#UUID-ff181dd3-898d-4ccd-0a18-05fe0a68199a_N1528725280956 "Configure Sitecore to work with Solr")
- [Rebuild the search Indexes](https://doc.sitecore.com/xp/en/developers/92/platform-administration-and-architecture/walkthrough--setting-up-solr.html#UUID-ff181dd3-898d-4ccd-0a18-05fe0a68199a_N1528438097356 "Rebuild the search Indexes")
Populate an XML schema for Solr
You must enable a Solr search provider in Sitecore before you populate an XML schema. The `Enabling a Search Provider` setting in the `Web.config` file tells Sitecore that Solr is enabled and Sitecore attempts to connect to the Solr server the next time the index is accessed:
```text
```
Solr uses a defined schema when it works with documents. You can modify an existing schema with the **Populate Solr Managed Schema** tool. This tool automatically populates Sitecore fields and makes sure all fields that Sitecore needs are present.
You can add more fields to this schema by adding fields to the managed-schema file as long as you do not change the system index fields. We recommend that you only do this after you have populated the Solr schema with the **Populate Solr Managed Schema** tool. You can use the **solr admin schema** page to add additional fields.
Follow these steps to populate a Solr schema:
1. Copy the Solr-provided configuration example folder called `_default` (or `basic_configs` in older Solr versions) from the `[SOLR_DIR]/server/solr/configsets` folder to the `[SOLR_DIR]/server/solr` folder, and name the copied folder the same as the appropriate index name.
2. Create a text file called `core.properties` in the folder you created (`[SOLR_DIR]/server/solr/[CORE_NAME]` ), and specify the following values:
```
name=[CORE_NAME]
config=solrconfig.xml
update.autoCreateFields=false
dataDir=data
```
3. Open the `managed-schema` file under the `conf` folder of folder created in step 1.
:::lettered
1. Set the value in `id` to `_uniqueid`.
2. In the `fields` section, add field configuration for `_uniqueid`: ``
3. Save your changes.
:::
4. Repeat step 1 and step 2 for all content search indexes.
> [!note]
> Do not do this for xdb indexes. Follow [this description](https://doc.sitecore.com/xp/en/developers/92/platform-administration-and-architecture/solr-managed-schemas.html "Solr managed schemas") instead.
5. Start Solr.
6. Start Sitecore, and go to the `Control Panel`.
7. In the **Schema Populate** window, select the indexes you want to populate:
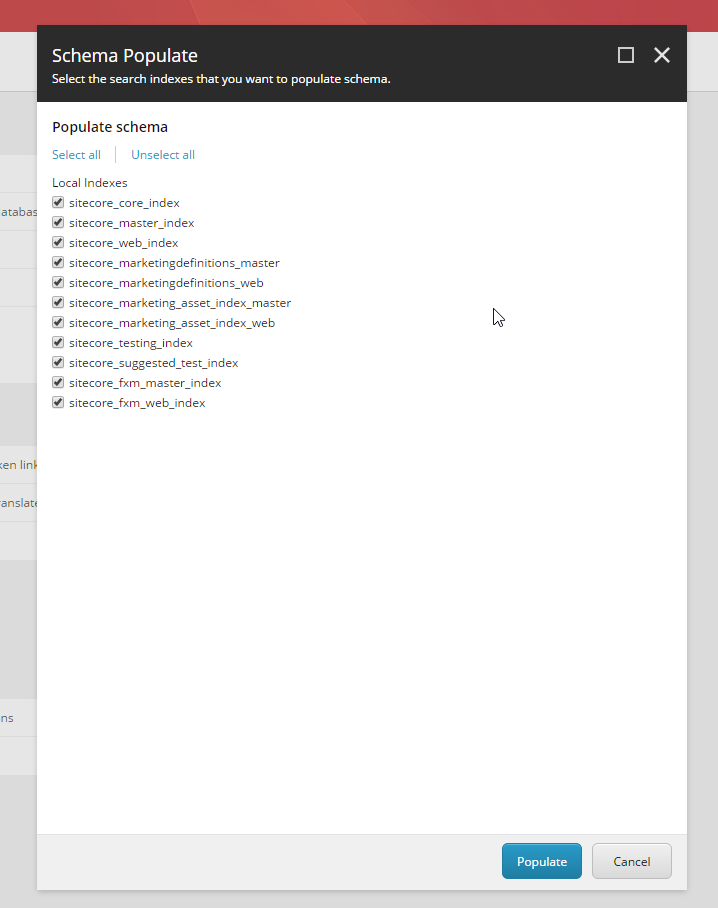
8. Click **Populate**.
Generate an XML Schema for Solr
It is possible to use manual schemas (the "classic" way) by using a Solr `schema.xml` file:
1. In the `Sitecore.ContentSearch.Solr.DefaultIndexConfiguration.config` file, change the value of the `ContentSearch.Solr.SolrSchemaClass` setting to `classic`.
2. Set the `` class to `ClassicIndexSchemaFactory` in the `solrconfig.xml` file.
Earlier versions of this topic have more information.
Verify that Solr is running correctly
After populating a new `schema.xml` file and updating the `solrconfig.xml` file, you must verify that Solr runs correctly.
To verify that Solr is running correctly:
1. Ensure Solr is not running. A full restart is needed so that it loads the new configuration.
2. Start Solr.
3. Check the output log files. If there are no errors, then open the Solr administration page.
To open the administration page, enter the following URL in your browser: http://localhost:8983/solr/admin:

4. Click **Core Admin** and then click a core. In this example, there is one core, called `itembuckets`:
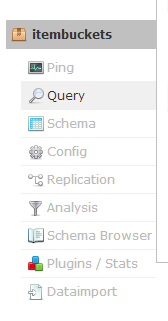
If you can see the Solr administration page and do not get any errors in the log files, then Solr is running correctly.
Configure Sitecore to work with Solr
The `solr.search` connection string specifies where the Solr server is located.
This example specifies the default Solr location:
```text
```
The following Solr specific settings can be found in the `Sitecore.ContentSearch.Solr.DefaultIndexConfiguration.config` file.
- Enabling a Search Provider
This setting tells Sitecore that Solr is enabled and so attempts to connect to the Solr server the next time the index is accessed. If it cannot connect you get an error.
``
- Maximum Number of Search Results
This is a global setting found in the `Sitecore.ContentSearch.config` file.
This setting contains the maximum number of documents to retrieve on a single request if a limit has not been specified in the query, for example, Take(10). It is important to remember, for performance reasons, when querying how many results will be returned from the query being run and to handle them correctly, for example by using paging.
``
- Enabling Batch Mode
When an item is indexed the composed document is saved to the search index. When the default Lucene provider is enabled then each write is being flushed to a file on the local disk. When a document is written using the Solr provider the update has to travel over a network.
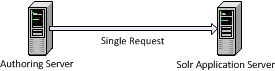
When an index is rebuilt a large number of document updates are created, this could result in a lot of network traffic which is not very efficient. Therefore using batch can help to optimize the update process as your indexes grow in size.
``
``
Batch mode (enabled by default) takes these document updates and only flushes to the Solr server when the batch has reached a certain size.
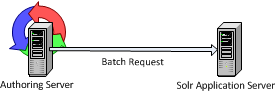
As your index grows you may want to increase this batch size to gain the most out of this process.
Rebuild the search Indexes
Before you can start using the Solr indexing system, you must re-index Sitecore content.
To rebuild the Sitecore search indexes:
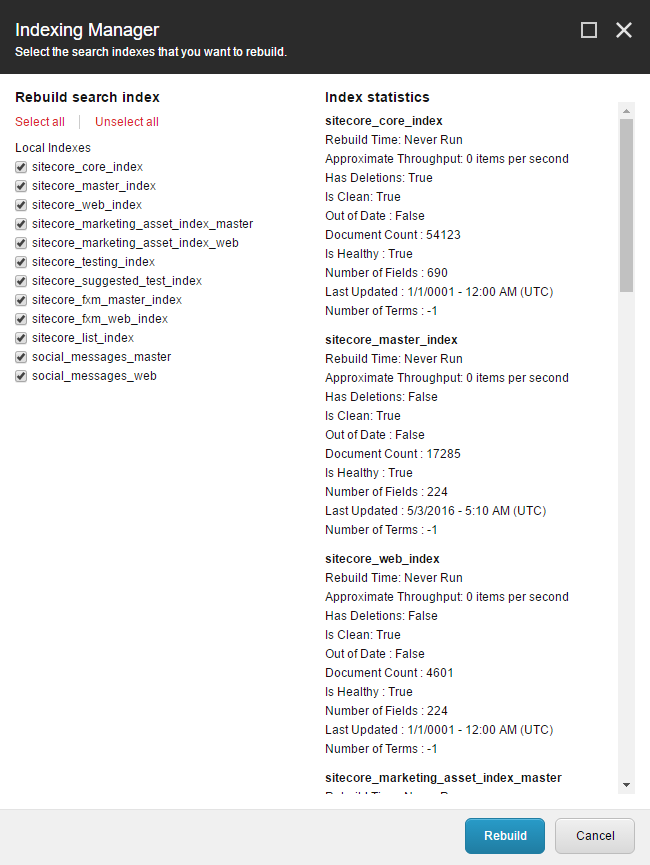
1. In the **Control Panel**, click **Indexing manager**.

2. Select **Select all**, and then click **Rebuild**.
> [!note]
> If you deployed marketing definitions before, it is not necessary to select the marketing definitions indexes as they are already rebuilt.