---
title: "Create a variant for a component"
slug: "create-a-variant-for-a-component"
abstract: "Learn how to dynamically render fields in components."
---
# Create a variant for a component
SXA comes with a set of default components. To encourage reusability, designers and front-end developers can also create variants. Variants are configurable adaptations of the default components. This gives authors more options in the way they present their content.
Creating a variant is a two-step process. First, you create the code for the variant in the relevant component TSX file, for example *Promo.tsx*. Then you create a variant in the Content Editor and refer to the variant as defined in the code.
The component TSX files are in the following directory:
*\[application root\]\\src\\components*
Code example:
The following example shows two variants for the Promo component: Default and Link. The `Default` variant renders a text field, and the `Link` variant renders a text field and a link.
```csharp
export const Default = (props: PromoProps): JSX.Element => {
if (props.fields) {
return (
);
}
return ;
};
```
```csharp
export const Link = (props: PromoProps): JSX.Element => {
if (props.fields) {
return (
);
}
return ;
};
```
To create a variant in the Content Editor:
1. In the Content Editor, click the site and open the Presentation/Headless Variants folder. This folder lists all the components that allow variants.
> [!note]
> To add a component to the folder, contact your administrator.
2. Right-click the component that you want to add the variant to, select **Insert**, and then select **Variant Definition**.
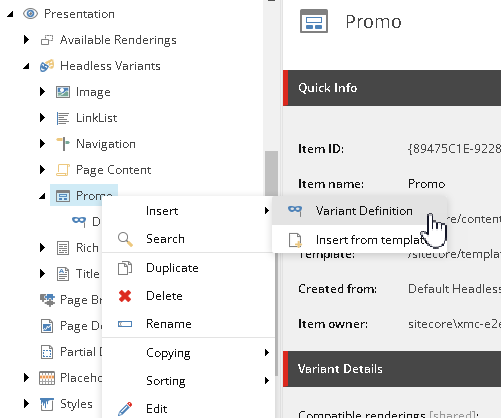
3. Enter a name that is consistent with how the variant is named in the code and click **OK**, for example *Link*.
4. In the **Variant Details** section, specify the page templates that the variant is available for. Double-click the relevant page template to move it to the list of selected items, and then click **Save**. If there are no templates selected, the variant is available for all pages.
5. Optionally, in the **Appearance** section, you can add a thumbnail image for the variant. This image appears in the **Variant** list and can help content editors select the best variant for their purpose.
| **Content Editor** | **Experience Editor** |
| --- | --- |
| 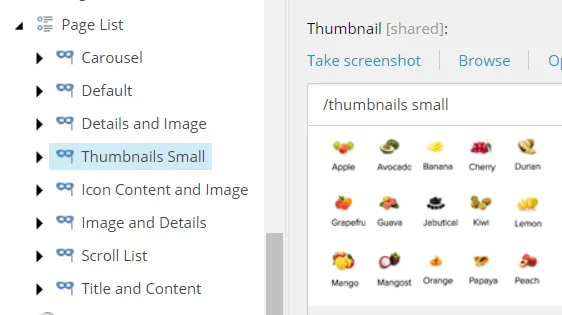 | 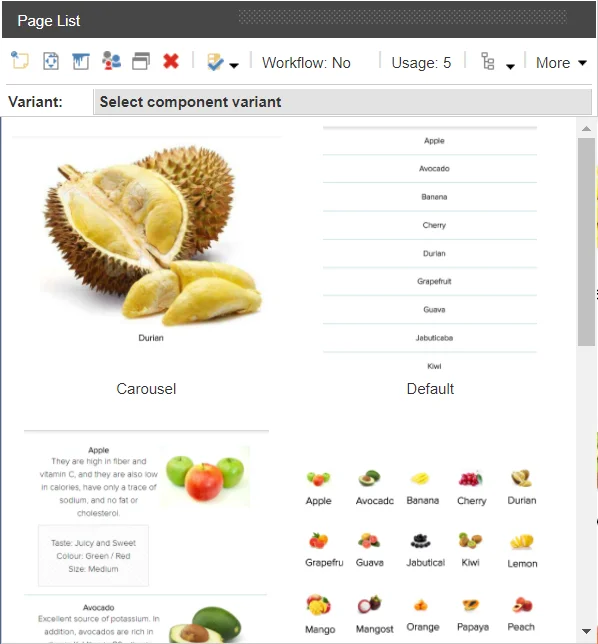 |
6. Save your changes.