---
title: "Set placeholder restrictions"
slug: "set-placeholder-restrictions-1188140"
abstract: "Control the use of components for specific placeholders."
---
# Set placeholder restrictions
To have some control over the components that can be placed in a placeholder, you can set placeholder restrictions. For example, if you want the footer design to be simple, without too much information, you can restrict complex components.
In the Content Editor, you can set placeholder restrictions for your layout placeholders. These restrictions are applied on all pages in the site. For example, if you add restrictions for a footer, these apply for all footers on every page of the site. In this way, you can control the content that content authors can place in layout placeholders.
Set placeholder restrictions in the Content Editor
In the Content Editor, you can set placeholder restrictions for your layout placeholders. These restrictions are applied on all pages in the site. For example, if you add restrictions for a footer, these apply for all footers on every page of the site. In this way, you can control the content that content authors can place in layout placeholders.
To add a placeholder setting for a site:
1. Navigate to the Presentation folder of your site, right-click **Placeholder Settings**, click **Insert**, and then click **Placeholder**.
2. Enter a name for the placeholder item and click **OK**.
3. In the **Data** section, enter the placeholder key as it appears under *Layout/Placeholder Settings/Foundation/Headless Experience Accelerator/Placeholder Settings*, for example **headless-footer**.
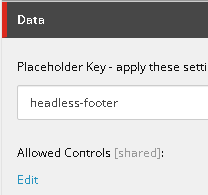
4. in the **Allowed Controls** field, click **Edit**.
5. In the **Select Items** dialog box, navigate to *Layout/Renderings/Feature/Headless Experience Accelerator*, select the components that you want to enable, and then click **OK**. For example, if you want a very simple footer, enable only the Rich Text and Image components for the footer.
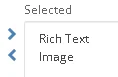
6. Save the placeholder setting.
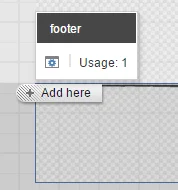
7. In the Experience Editor, when you click **Add here**, for example, in the footer, you can only select the components that you just added. Other components can still appear in the Toolbox but the content owner is not able to drag them to the placeholder.
> [!note]
> If you add placeholder restrictions to all the placeholders of a page, then the Toolbox displays only the components that are allowed.
Set placeholder restrictions in the Experience Editor
In the Experience Editor, you can create placeholder restrictions on specific pages instead of all the pages that belong to a site. You can also edit existing placeholders, for example, if the Navigation component is generally not allowed in the Main placeholder, but you want to make an exception for a specific page.
To create a new placeholder restriction, or edit an existing one:
1. In the relevant placeholder, click **Edit placeholder settings**.
2. To create a new placeholder restriction:
- In the **Select the Placeholder Settings** dialog box, click **Create New Settings**.
- To add components, click **Edit**.
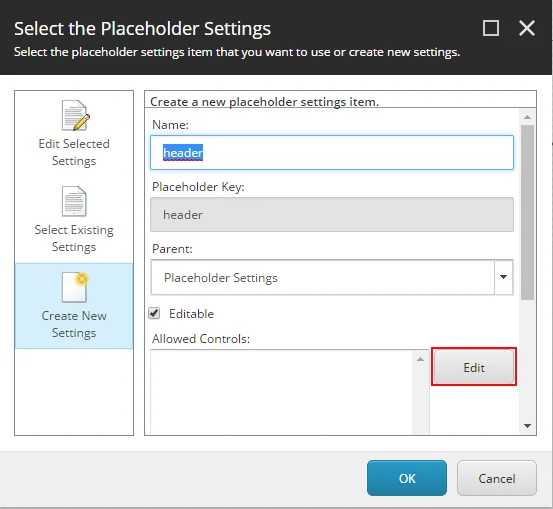
- In the **Select Items** dialog box, navigate to Layout/Renderings/Feature/Headless Experience Accelerator, select the components that you want to enable, and click **OK**.
3. To edit an existing placeholder restriction:
- In the **Select Placeholder Settings** dialog box, click **Edit Selected Settings**.
- To edit the components allowed, click **Edit**.
- In the **Select Items** dialog box, select the additional components, or remove existing components, and then click **OK**.
4. In the original dialog box, click **OK** again to save your changes.
> [!note]
> To apply an existing placeholder restriction, click Select existing settings , expand the Placeholder Settings node, and select a restriction.