Common issues
This section lists some common issues related to the installation of a Developer Workstation with containers, along with proposed solutions.
I cannot upload a Translations file to the website root folder
If the Upload Files dialog hangs during the upload operation, it writes the following errors to the log file:
This happens because the Import language dialog box uploads translations files to the website root folder by default and for security reasons Write access is denied for the website root folder.
The upload folder, however, has Write access enabled. To resolve this issue, upload the translations files to the upload folder.
To upload a translations file:
-
In the Open Language File dialog box, select the
uploadfolder and then click Upload.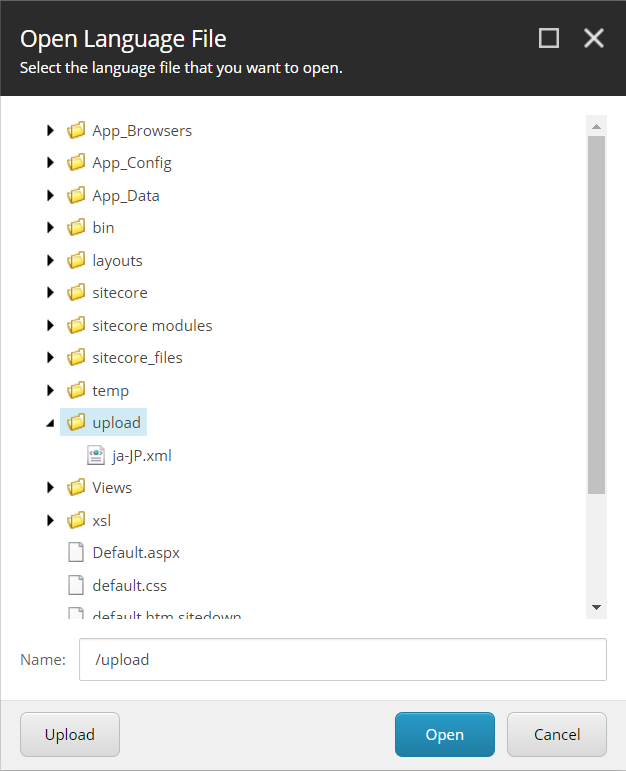
-
In the Upload Files dialog box, upload the translations file to the
uploadfolder. -
Import the translations file from the
uploadfolder.
The translations xml file is saved to the Media library. You can delete it after you import the translations.
I can only see the main Sitecore log files for the Sitecore roles containers
The LogMonitor tool collects the log files for containers. By default, it monitors the following log files:
- System event log – error level entries
- IIS logs
- Primary Sitecore log –
log.*.txtfiles for the Sitecore roles - xConnect log –
xconnect-log-*.txtfiles for the xConnect roles
Auxiliary Sitecore log files, such as for search, crawling, and publishing, are not monitored on Sitecore containers.
To see all the Sitecore log files for a Sitecore role container, you must create a Dockerfile with the corresponding role image and reconfigure the LogMonitor tool or replace the entire configuration file with the updated configuration.
To reconfigure the LogMonitor tool:
-
In the
c:\inetpub\wwwroot\App_data\logsfolder, open theC:\LogMonitor\LogMonitorConfig.jsonfile. -
In the
sourcesnode, edit thefiltersetting:
Now you can use the Dockerfile to build a new docker image for the Sitecore role.
You can also view all the Sitecore log files directly from the container’s file system by connecting to the corresponding container from a PowerShell or command prompt terminal.
I am experiencing performance issues on Hyper-V
If you are running your content management (CM) server on Hyper-V, and you experience performance issues, such as the server hanging or crashing during resource consuming tasks, the server might not have enough memory. The default memory amount for Hyper-V is 1 GB, however, we recommend a minimum of 4 GB to avoid performance issues.
To set a minimum memory limit of 4 GB:
- In the Container Deployment Package, in the
docker-compose.ymlfile, in the CM service configuration, addmem_limit:4GB.
Solr
Solr requires Basic Authentication
Starting from Sitecore 10.5.0, all Solr connection should be basic authenticated. Sitecore setup will assist in creating user and permission needed for the connection from Content Management (CM).
Format of the connection string should be https://<username><password>@<solrhost>:<port>/solr
Solr Admin permission required
You can use your own Solr instance, however it should have basic authentication set up.
Refer to the Apache Solr Reference Guide.
A Solr Admin user will be required during the setup of Sitecore. The user is required to have at least the following permissions to ensure the setup is successful:
core-admin-readcore-admin-editcollection-admin-read(only if running SolrCloud)collection-admin-edit(only if running SolrCloud)security-editsecurity-readhealth
Solr Connection User permission required
During Sitecore setup, a user with mininum permission set needed for Sitecore will be created to be used as connection user, authenticating the request between Sitecore roles and Solr.
Solr Apply Security Logs
After Solr pod is spun up, a post start script is run, setting up Basic Authentication and Admin user in the Solr. The log is saved in C:\data\ApplySolrSecurity-post-start.log which should be bound to <your file system>/solr-data.