Walkthrough: Creating a custom contact facet
In Sitecore Experience Platform, contact facets are used to store data on contacts. This walkthrough guides you through the process of creating a custom contact facet and configuring the synchronization process to populate the facet with data from Microsoft Dynamics 365 for Sales.
In this example you create a custom contact facet to store the name of the account the contact is associated with. This walkthrough describes how to:
- Create a Microsoft Visual Studio project
- Define a collection model
- Deploy and configure the collection model
- Specify how to read from the Dynamics contact
- Specify how to write to the contact facet
- Map Dynamics data to the contact facet
- Map the contact facet to the contact
- Add new facet to pipelines
Create a Microsoft Visual Studio project
To store custom data on a contact, you must create a custom contact facet and collection model. You must create a Microsoft Visual Studio project to implement the custom components in code.
In xConnect, a collection model defines which contact facets are available. Before you can store data in a custom contact facet, you need a collection model that includes the custom contact facet.
To build and deploy an assembly with the custom components:
-
In Visual Studio, create the following project:
Project type Class Library (.NET Framework) .NET version .NET Framework 4.6.2 Project name Examples.Connect.Dynamics -
Add references to the following NuGet packages:
-
Sitecore.DataExchange.Tools.DynamicsConnect.NoReferences -
Sitecore.XConnect.NoReferences
NoteSitecore’s public NuGet feed is available at https://nuget.sitecore.com/resources/v3/index.json.
-
-
To create a contact facet for storing the account name, in Visual Studio, add the following class:
-
To implement a collection model, in Visual Studio, add the following class:
-
To deploy the assembly on your Sitecore server, build the Visual Studio project, and copy the resulting
Examples.Connect.Salesforce.dllfile to your Sitecore server.
Define a collection model
A custom data provider exposes the facets defined in the collection model. This makes it easier to configure data mapping that involves xConnect entities by showing the user what is available and reducing the changes that you accidentally enter an invalid value.
You must register your custom collection model before it can be used. This involves updating the components and configuration on several Sitecore server roles.
To define the collection model:
-
In Sitecore, In the Content Editor, navigate to Sitecore/System/Settings/Data Exchange/Providers/xConnect/Collection Models.
-
Add the following item:
Template Collection Model Folder Item name Custom Models -
In the new collection model folder item, add the following item:
Template Compiled Collection Model Item name Custom Collection Model for Dynamics -
In the new compiled collection model item, on the Content tab, in the Settings section, set the following field values:
Field Value Collection Model Type Examples.Connect.Dynamics.DynamicsConnectCollectionModelEx, Examples.Connect.Dynamics -
Save the item.
Deploy and configure the collection model
The collection model must be deployed to the xConnect before any custom data can be sent to xConnect. This is accomplished by copying a JSON file that describes the collection model.
In order to make a connection to xConnect you must specify a collection model. This ensures xConnect and the xConnect client know exactly what to expect from one another.
Testing the configuration ensures that the collection model is deployed and the xConnect client endpoint is configured properly.
To deploy and configure the collection model:
-
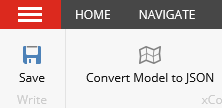
To deploy the collection model, navigate to the custom collection model. In the ribbon, on the Data Exchange tab, click Convert Model to Items. Then click Convert Model to JSON.
-
Save the model file, and deploy the model file to the following servers:
- xConnect collection
- xConnect indexing
-
In the Content Editor, navigate to Sitecore/System/Data Exchange.
-
To configure the xConnect Client Endpoint to use the collection model, navigate to Sitecore/System/Data Exchange/
/Endpoints/Providers/xConnect/xConnect Client Endpoint -
Set the following field values:
Field Value Collection Model Collection Models/Custom Models/Custom Collection Model for Dynamics -
Save the item.
-
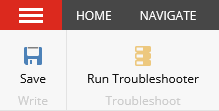
To test the configuration, in the ribbon, on the Data Exchange tab, click Run Troubleshooter.
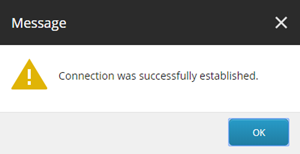
A message appears, informing you a connection to the xConnect collection service was established.
Specify how to read from the Dynamics contact
The tenant must be configured to understand the structure of the data being read from Dynamics. This section describes how to update the tenant in order to incorporate this information.
A value accessor is used to represent that the account is a property of the contact in Dynamics. This value accessor serves a couple of purposes:
- When you read contacts from Dynamics, you must tell Dynamics to include the account for the contact. The value accessors in the value accessor set are used to determine which fields on the contact object should be read. Adding a value accessor enables you to specify that you want to read additional fields from Dynamics.
- When it is time to configure the mapping of data from Dynamics to Sitecore, the value accessor is used to specify which value to read from the Dynamics contact.
To add a value accessor for the account on the contact:
-
In the Content Editor, navigate to Sitecore/System/Data Exchange.
-
Select your tenant.
-
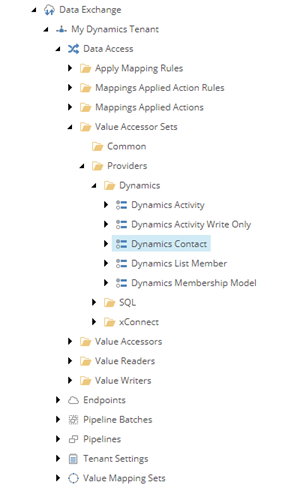
Navigate to Data Access/Value Accessor Sets/Providers/Dynamics/Dynamics Contact.
-
Add the following item:
Template Entity Attribute Value Accessor Item name Account on Dynamics Contact -
In the new item, on the Content tab, in the Attribute section, set the following field values:
Field Value Attribute Name parentcustomerid Value Type Formatted Value -
Save the item.
Specify how to write to the contact facet
To set up a value accessor set:
-
In the Content Editor, navigate to Sitecore/System/Data Exchange.
-
Select your tenant.
-
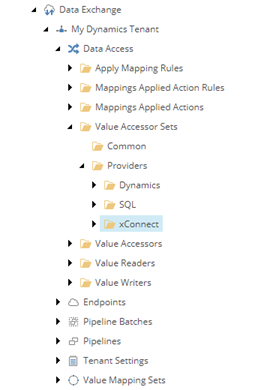
Navigate to Data Access/Value Accessor Sets/Providers/xConnect.
-
Add the following item:
Template xConnect Entity Facet Value Accessor Set Item name xConnect Contact Dynamics Account Information Facet -
In the new item, add the following item:
Template xConnect Entity Facet Property Value Accessor Item name Account Name on Dynamics Account Information Facet on xConnect Contact -
In the new item, on the Content tab, in the Settings section, set the following field value:
Field Value Facet Property Collection Models/Custom Models/Custom Collection Model for Dynamics/Facets/Contact/DynamicsAccount/AccountName -
Save the item.
Map Dynamics data to the contact facet
-
Open the Content Editor, and navigate to Sitecore/System/Data Exchange.
-
Select your tenant.
-
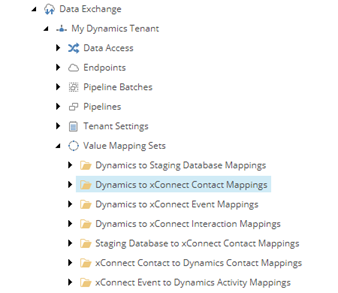
Navigate to Value Mapping Sets/Dynamics to xConnect Contact Mappings.
-
Add the following item:
Template Value Mapping Set Item name Dynamics Contact to xConnect Contact Dynamics Account Information Facet -
In the new item, add the following item:
Template Value Mapping Item name Account Name -
In the new item, on the Content tab, set the following field values:
Section Field Value Source Source Accessor Data Access/Value Accessor Sets/Providers/Dynamics/Dynamics Contact/Account on Dynamics Contact Target Target Accessor Data Access/Value Accessor Sets/Providers/xConnect/xConnect Contact Dynamics Account Information Facet/Account Name on Dynamics Account Information Facet on xConnect Contact -
Save the item.
Map the contact facet to the contact
To map a contact facet:
-
In the Content Editor, navigate to Sitecore/System/Data Exchange.
-
Select your tenant.
-
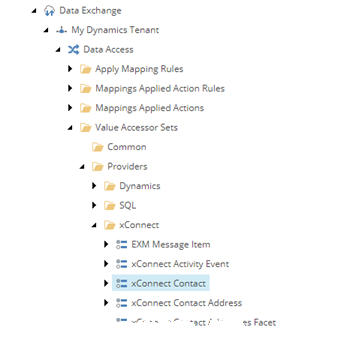
Navigate to Data Access/Value Accessor Sets/Providers/xConnect/xConnect Contact.
-
Add the following item:
Template xConnect Entity Facet Value Accessor Item name Dynamics Account Information Facet on xConnect Contact -
In the new item, on the Content tab, in the Settings section, set the following field values:
Field Value Facet Definition Collection Models/Custom Models/Custom Collection Model for Dynamics/Facets/Contact/DynamicsAccount Mapping Set Value Mapping Sets/Dynamics to xConnect Contact Mappings/Dynamics Contact to xConnect Contact Dynamics Account Information Facet -
Save the item.
-
Select your tenant.
-
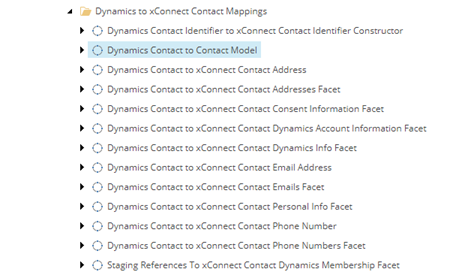
Navigate to Value Mapping Sets/Dynamics to xConnect Contact Mappings/Dynamics Contact to Contact Model.
-
Add the following item:
Template Value Mapping Item name Dynamics Account Information Facet -
In the new item, on the Content tab, set the following field values:
Section Field Value Source Source Accessor Data Access/Value Accessors/Common/Value Accessor with Raw Value Reader Set Target Target Accessor Data Access/Value Accessor Sets/Providers/xConnect/xConnect Contact/Dynamics Account Information Facet on xConnect Contact -
Save the item.
Add new facet to pipelines
In order for the information in the new facet to be processed, you must add it to the Read Contacts from xConnect and Process Single Contact from Dynamics pipelines.
To add the facet to pipeline steps:
- To add the fields for the facets to the pipeline step, in the Content Editor, navigate to Sitecore/System/Data Exchange.
- Navigate to
/Pipelines/xConnect Contacts to Dynamics Sync Pipelines/Read Contacts from xConnect Pipeline/Read Contacts from xConnect . - On the Content tab, in the Contact Settings sections, in the Contact facets to Read field, add xConnect Contact Dynamics Account Information Facet to the Selected column. Save the pipeline step.
- To add the facet to the Process Single Contact from Salesforce pipeline step, in the Content Editor, navigate to
/Pipelines/Dynamics Contacts to xConnect Sync Pipelines/Process Single Contact from Dynamics Pipeline/Resolve Contact Model by Dynamics Id from xConnect . - On the Content tab, in the xConnect Settings sections, in the Facets to Read field, locate Collection Models/Custom Models/Custom Collection Model for Dynamics/Facets/Contact/DynamicsAccount. Add it to the Selected column. Save the pipeline step.