Add a JSON rendering and variant to your page
The JSON data model comes with three predefined renderings to make page design easy. You can construct your pages by dragging renderings from the Toolbox to the page. All JSON renderings are JSON variants enabled.
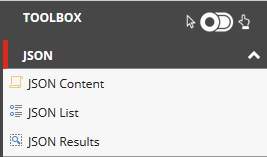
By default, there are three JSON renderings available:
-
JSON Content – used to expose fields of a page using JSON renderings and JSON variants. By default, this rendering loads two fields on the page. You can edit these fields.
-
JSON List – displays lists of pages by predefined or composed queries.
-
JSON Results – displays the results of a search query.
Switch to JSON
Switch to JSON
Before you can start working with the JSON renderings, you must switch to the JSON device.
To switch to the JSON device:
-
In the Experience Editor, on the ribbon, on the Experience tab, click Default, and then click JSON.
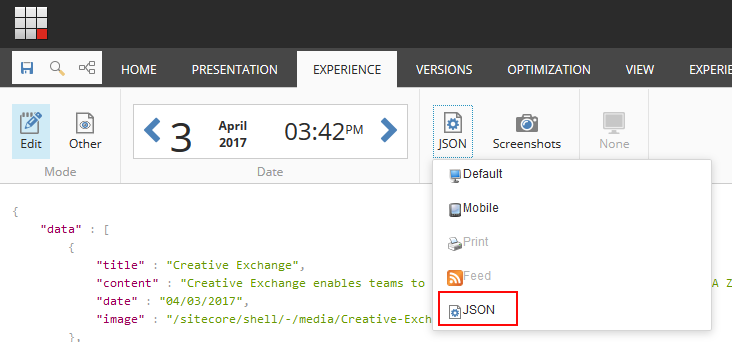
The JSON renderings are now available for you to use in the Toolbox in the right panel.
If you work on a touch device, such as a tablet or a touch-enabled laptop, by default the Toolbox opens in touch mode. If you work on a touch-enabled laptop, you can switch to desktop mode by clicking the arrow in the upper right of the toolbar  .
.
Add a JSON rendering
Add a JSON rendering
In the Experience Editor, you can add a rendering to a page by dragging it from the Toolbox. For example, if you want to list the pages of your site use the JSON List rendering.
To add a JSON rendering to a page:
-
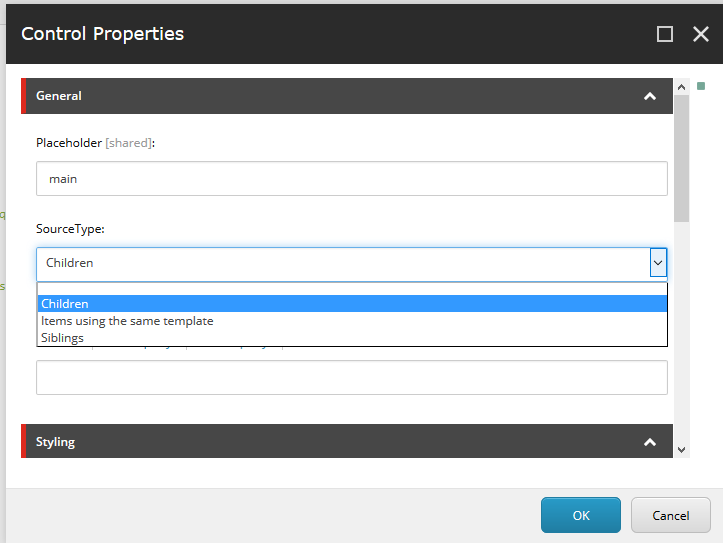
In the Toolbox in the right panel, find the relevant rendering. When you click and start dragging a rendering, the placeholders where you can drop the rendering light up in blue. Click to drop the rendering on the page. For example, drag the JSON List rendering to the page.
NoteBy default, the JSON List rendering displays the children of the current item. For example, when you start on your home page and drag the JSON List rendering to the page, it lists all the pages of your site. This is because the SourceType field by default is set to Children.
-
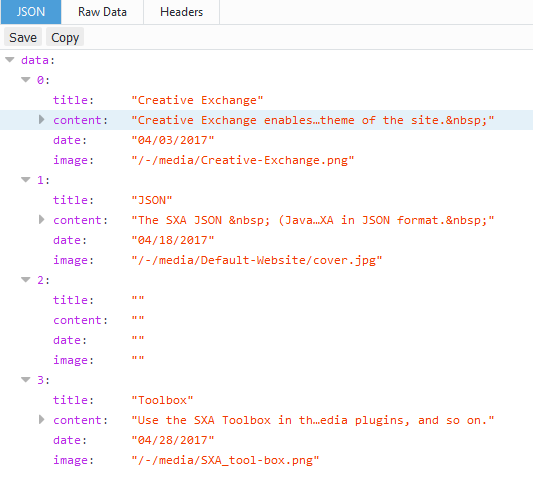
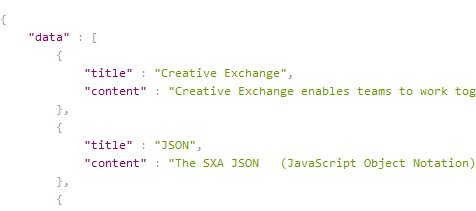
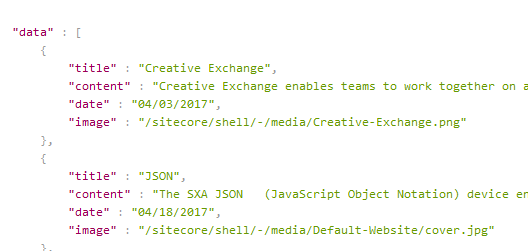
To see the list, save the page:
Add a JSON variant
Add a JSON variant
To build a more complex list, you can add a JSON variant. For example, if besides the title and content, you want to add a field for the image and a date.
To add a JSON variant:
-
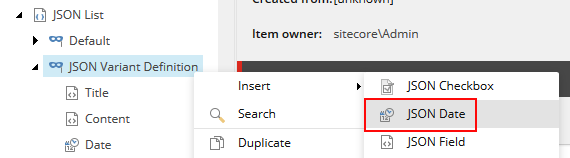
Navigate to sitecore/Content/Tenant/Site/Presentation/Rendering Variants/JSON List, right-click JSON List, click Insert, and click JSON Variant definition.
-
Enter a name and click OK. For example, to add JSON fields for the title and the content, add a JSON Image, and a JSON Date field.
-
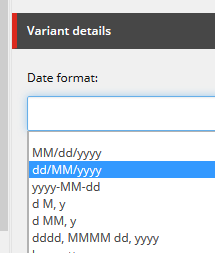
In the Variant details section, select the date format and save the item.
-
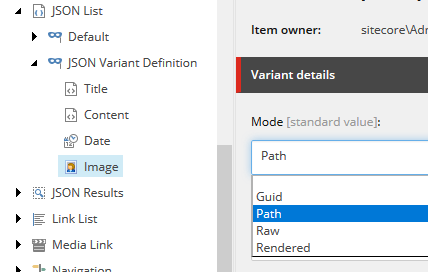
For the Image field, in the Variant details section, decide whether you want the image to display in Guid, Path, Raw, or Rendered mode.
Select a JSON variant
Select a JSON variant
To select a JSON variant:
-
In the Experience Editor, navigate to the JSON rendering on the page, for example, the JSON List rendering, and in the Variant field click the variant from the drop-down list.

-
To view the new list, save the page.
-
To view the JSON variant, on the ribbon, on the Experience tab, click Other, and click Preview.