Rebuild the xDB index in Solr
This topic describes how to rebuild the xDB Search index, if you are using the Solr search provider. Before rebuilding, ensure that your environment meets the following requirements:
-
There are two xConnect Solr cores: the live core (usually
xdb) and the rebuild core, which has a_rebuildsuffix (likexdb_rebuild). -
Both cores are based on the
basic_configsfile. -
xConnect schema modifications have been applied to both cores.
Rebuilding the reporting database does not trigger a rebuild of the index. You must rebuild the index separately.
Invoke the rebuild request command
The indexer changes process type, access way, and working folder depending on where it is hosted:
|
Sitecore hosted on-prem |
Sitecore hosted in cloud | |
|---|---|---|
|
Process type |
A Windows service on the xConnect Collection Search instance. |
An Azure App Service WebJob on the xConnect Collection Search instance. |
|
Access way |
PowerShell. |
The Kudu debug console. |
|
<WORKING> folder |
|
Each time Azure redeploys the WebJob, it creates a uniquely named temporary subfolder, for example |
To invoke the rebuild request command:
-
Go to the server where the xConnect Search Indexer is running and open a command line.
-
Go to the xConnect Collection Search IndexWorker folder.
-
Run
Sitecore.XConnectSearchIndexer.exe -rr(alternativelySitecore.XConnectSearchIndexer.exe -requestrebuild). The command registers a small document in the live core signaling that the rebuild should be started. The xConnect Search Indexer will notice the document and start the rebuild process.
Create a rebuild core
Create a rebuild core
If you do not have a rebuild core, complete the following steps. If you have a rebuild core, skip this section.
For Managed Cloud solutions, skip this section, because xdb_rebuild is provisioned out of the box.
To create a rebuild core:
-
Go to the Solr core folder:
<Solr root>\server\solr -
Create a copy of your core with a
_rebuildsuffix. If your core is namedxdb, name the copyxdb_rebuild. -
Open the
xdb_rebuildfolder and delete thecore.propertiesfile and thedatafolder. -
Open a browser and go to the Solr administrative interface (usually
https://localhost:8983/solr/). -
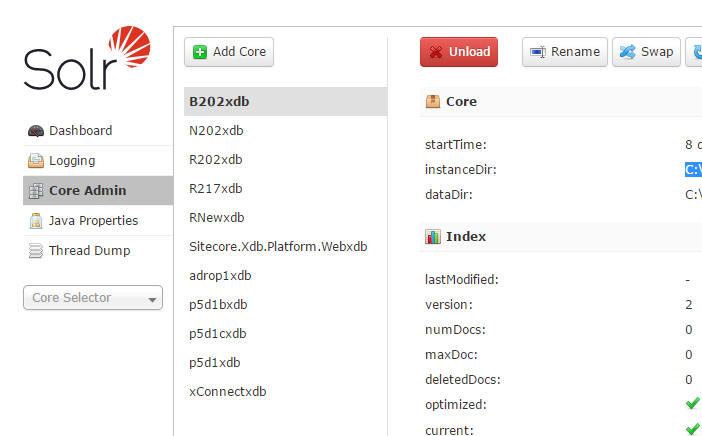
Click Core Admin in the left-hand menu:
-
Click Add Core and type in the name and path (InstanceDir) of your rebuild core (leave other properties unchanged):

Create aliases
Create aliases
To create aliases for your collections:
-
In the Solr administration UI, go to the Collections page using one of the nodes you created.
-
Click Create Alias.
-
Create an alias named xdb_rebuild and in the Collections list, click xdb_rebuild_internal.
-
Create a second alias named xdb and select xdb_internal in the Collections list.
-
To see a list of all aliases, use the URL
https://<solrurl>/solr/admin/collections?action=LISTALIASES. -
Apply the schema modifications from the
<xconnect-root>\App_Data\solrcommands\schema.jsonfile to both collections using the Solr Schema API.
Use xdb and xdb_rebuild in your connection strings, not xdb_internal and xdb_rebuild_internal. xdb and xdb_rebuild are the default names of the primary and secondary indexes. If you change the names of the indexes, you must update all connection strings.
Don't give a collection and an alias the same name.
You have now created a SolrCloud farm. Before you can use it with xConnect, configure the xConnect roles to use SolrCloud.
Rebuild the core
Rebuild the core
You can't trigger an index rebuild from a user interface or from the xConnect Client API. Instead, trigger the rebuild process in one of the following ways:
Invoke the rebuild request command
To invoke the rebuild request command:
-
Go to the server where the xConnect Search Indexer is running and open a command line.
-
Go to the xConnect Collection Search IndexWorker folder:
<xConnect Collection Search service root>\App_Data\jobs\continuous\IndexWorker. -
Run
XConnectSearchIndexer -rr(alternativelyXConnectSearchIndexer -requestrebuild). The command registers a small document in the live core signaling that the rebuild should be started. The xConnect Search Indexer will notice the document and start the rebuild process.
Manually post a rebuild document
To manually post a rebuild document:
-
Post the following document directly from PowerShell to the Solr live core:
Invoke-WebRequest https://localhost:8983:/solr -Method Post -Body '{"id":"xdb-rebuild-status","lastupdated_dt":"2017-05-24T10:15:47.603436Z","rebuildstate_l":1,"progresstotal_d":0.0,"progresscurrent_d":0.0}'
Confirm rebuild
Confirm rebuild
When the rebuild is complete, the cores are swapped, and the rebuilt core becomes the live core. When you swap cores, names are swapped, but physical folder locations aren't swapped:
|
Name Before Rebuild |
Name After Rebuild |
Core Location |
|---|---|---|
|
xdb (live) |
xdb_rebuild |
|
|
xdb_rebuild |
xdb (live) |
|
At this point, the rebuild core is no longer in use. However, it still has all data that was in the live core before the swap.
Manually swapping cores back
If you need to swap back (not rebuild a second time), you must first make sure the cores were recently swapped. Swapping back only works if:
-
The xDB Collection provider change tracking data still holds all changes since the cores were swapped.
-
The xConnect Search can be offline for a period of time. This is necessary for the cores that are swapped back to get up to date by pulling the above changes. The smaller the time window since the swap, the less time this takes.
Assuming you meet these requirements, proceed with the following instructions. If you do not meet them, you can not successfully swap cores.
-
Stop the indexer.
WarningFailing to stop the indexer before swapping back the cores might cause the indexer to skip data.
-
Swap the cores by using the Solr swap command.
-
Start the indexer again.
Clean up the rebuild core
Clean up the rebuild core
To save space, you can delete deprecated index data from the old core.
Make sure you delete the old core, if your reason for rebuilding is to remove all PII sensitive data from the index. The old core still contains this data.