Walkthrough: Building a simple rendering
The SXA toolbox contains default renderings for simple text, images, videos, social media plugins, and so on. You can also create a new rendering.
Create a rendering
Create a rendering
SXA renderings are Sitecore controller renderings and SXA uses the same basic structure for all renderings. The wrappers are the same for every rendering and always contain:
-
The
componentelement
-
The
Html.Sxa().Component()helper
-
The content:
div class="component-content"
To be able to use the Creative Exchange functionality in SXA, you must use the Html.Sxa().Component(). This helper injects data attributes for a Creative Exchange export.
To create a rendering:
-
In the rendering definition item, specify what action Sitecore takes to render the component. For example, for the title rendering:

Create the controller and action method
Create the controller and action method
Every SXA rendering needs a controller. SXA enables you to inherit from a base SXA controller. It provides useful properties and logic to automatically resolve the view name and provide the model (Rendering, PageContext). It is best practice to use these base classes when you build a new rendering or extend an existing rendering.
To create the controller and the action method:
-
In an ASP.NET MVC Web application project in Visual Studio, create a new controller. In SXA, controllers are kept fairly simple and most of the logic is implemented in repositories. To make the controllers use the repositories, you must create controller renderings with a construction injection.
-
Use the
StandardControllerbase class to implement the standardIndex()action method that automatically resolves the view name based on the rendering item name. For example:
Inject a repository into a controller
Inject a repository into a controller
SXA uses repositories to provide the model for the MVC views. Therefore, when you finish the controller, you must inject the repository into the controller. You can inject your repository in two ways:
-
Construction injection - we recommend to use this injection. For example:
-
ServiceLocation injection - this injection is used in processors or commands and sometimes in controllers. For example:
SXA provides base repositories. For example, the VariantsRepository and the ListRepository provide useful properties and make implementing your own repository a lot easier. Another example is the ModelRepository base class that provides useful properties such as:
-
PageContext- represents information required to service an individual request for a specific device, containing information about the HTTP response under construction.PageContextcontains properties that expose the requested item, device, and thePageDefinitionobject created for the request. -
IsEdit- checks if Edit mode is on. -
IsControlEditable- specifies whether the rendering should be editable. -
Attributes– dictionary of attributes that will be applied to the rendering.
All repositories must have their own interface, even when a repository is empty and is just using base interface methods. This is because it is used later on when registering the Dependency Injection container:
And here is an example of simple repository:
Remember to register your repository in the DI container. You can do that using a config file:

And the view could look like this:
Most SXA renderings are designed for reusability and pull data from data source items. This means that the content they display is not bound to the page on which they appear but is stored in data source items. You can add data source logic to the rendering by using:
if (DataSourceItem == null) { ... }
Create a controller rendering in Sitecore
Create a controller rendering in Sitecore
To create the rendering for users to access from the Toolbox, you have to create the item in Sitecore and use the controller name and the action name to link the item with the code.
To create a controller rendering in Sitecore:
-
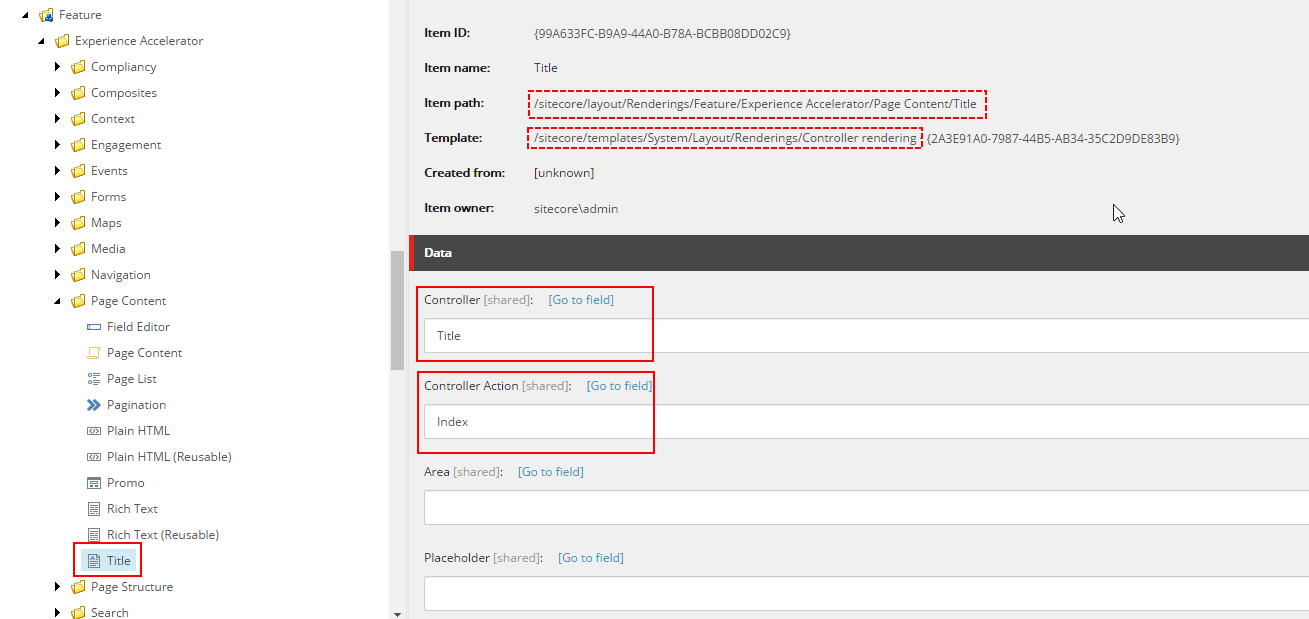
In the Content Editor, go to sitecore/Layout/Renderings/Feature/Experience Accelerator and right-click the section that you want to add the rendering to.
NoteThe Section names in Layouts/Renderings/Feature/Experience Accelerator are the actual names used in the Toolbox.
-
Click Insert, Controller Rendering. For example, to add the controller rendering item for the Title rendering in:
-
The Controller field – enter Title
-
The Controller Action field – enter Index. This action is inherited from the StandardController.
-
-
In the Experience Accelerator section, you can add additional settings for your rendering. For example, a specific CSS class, whether it can use a page as a datasource or whether it can use dynamic placeholders:
Field
Description
Additional compatible templates
Enables to select multiple templates for data source. For example, for the Promo rendering you use the Promo templates but also other data sources such as Text and Image.
Can select Page as a data source
Renderings that can use content from the current page have an option to select the page as a data source. When the Can select Page as a data source box is selected, it lets you use a page as a data source. This option is available for renderings that take content from the current page such as Page Content, Page List, JSON content, and JSON list.
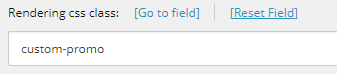
Rendering css class
Enter the CSS class for the rendering. For example:

Rendering view path
By default, the view name in SXA is resolved as the rendering definition item name. To provide a custom path, enter the location of the view here.
OtherProperties
Specify any other properties here. For example:
-
IsRowSplitterRendering– for renderings that split rows. -
IsColumnSplitterRendering– for renderings that split columns. -
IsRenderingsWithDynamicPlaceholders– for renderings that use dynamic placeholders. -
IsPaginationEnabledRendering– for renderings that support pagination. -
IsNeverLocalRendering- for disabling the editing of inherited renderings. -
IsCompositeRendering– for composite renderings. -
IsAutoDatasourceRendering- for renderings for which a data source is automatically created after adding that rendering to a page.
-
-
Save and publish the item.
Register dependencies
Register dependencies
Dependency injection (DI) is a technique for achieving loose coupling between objects and their collaborators, or dependencies you can use the Sitecore dependence injection. Without dependency injection, a class must directly instantiate collaborator or use static references. With dependency injection, the objects a class need are provided for it. Most often, classes will declare their dependencies through their constructor. Sitecore only supports this approach, known as constructor injection. The Sitecore implementation of DI is based on the Microsoft.Extensions.DependencyInjection abstractions from ASP.NET Core.
Remember to register your repository in the DI container. You can do that using a config file:
For SXA renderings, you can also use the Sitecore base class IServicesConfigurator to configure services from code:
Next, you need to add the config with a configurator node that points to that RegisterDependencies class.
For example:
Add grid and styling support
Add grid and styling support
The default SXA renderings come with grid and style support. If you want your custom rendering to be compliant with SXA grid and styling, you need to provide a parameter template and assign some base SXA templates.
To add grid and styling support for a rendering:
-
First, add a parameters template to your rendering. Navigate to sitecore/Layout/Feature/Experience Accelerator and click the new rendering.
-
In the Editors option section, in the Parameters Template field, enter the path to your template.
-
Now you can assign some base SXA templates to your rendering parameter template such as for example:
-
IStyling– for styles support. This template adds a new field in the control properties for that rendering and a additional button on the edit frame of the rendering. -
IComponentVariant– for rendering variant support. This template adds a rendering variant drop-down in the control properties and Variant Selector drop-down on the edit frame. -
Grid Parameters– for grid support. This template adds grid field in the control properties and additional button on the edit frame of the rendering.
-
Add a rendering to the toolbox
Add a rendering to the toolbox
In the Presentation folder of your site, you can set which renderings are visible in the Toolbox in the Experience Editor. You can also restructure the toolbox.
To add a rendering to the SXA toolbox:
-
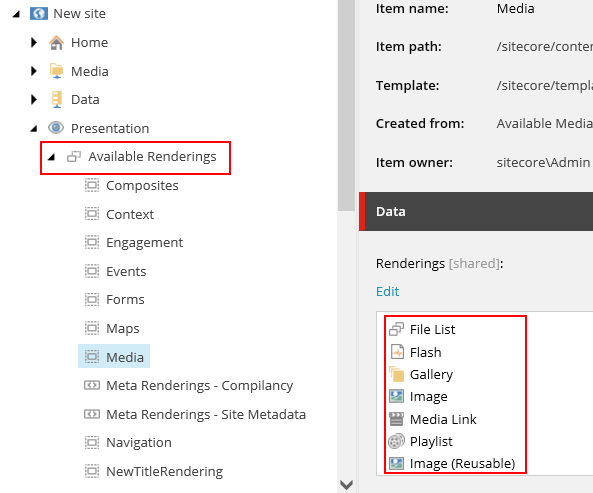
In your site, navigate to Presentation/Available Renderings
-
In the Data section, in the Renderings field, click Edit.
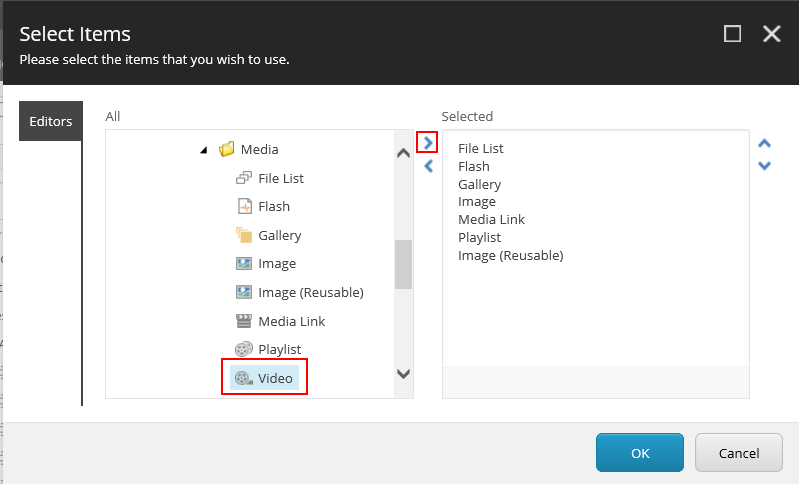
-
In the All section on the left, click a rendering and then click the right arrow to move it to the list of selected renderings. When you have added all the renderings that you want in the SXA toolbox, click OK.