Walkthrough: Using code to define data mapping
When using Data Exchange Framework, the standard approach for mapping data is to configure the mapping in the tenant. In many cases, this approach works well because it reduces the amount of custom code needed. Specific mappings can be added or removed as needed, without having to write any code.
However, there are cases where the mapping logic is too complex to be described through configuration. There are also cases where existing data mapping logic should be reused. In these cases, you must define data mapping using code.
This walkthrough describes how to build, deploy, and integrate the components needed to implement code-based data mapping.
- Create Visual Studio project for data mapping
- Implement a custom value mapping set
- Create a template for a custom value mapping set
- Implement a converter for a custom value mapping set
- Integrate a custom value mapping set
Create a Visual Studio project for data mapping
You need a Microsoft Visual Studio project to implement the data mapping logic.
To create the project:
-
In Visual Studio, create the following project:
Project type Class Library (.NET Framework) .NET version .NET Framework 4.7.1 Project name Examples.DataExchange -
Add references to the following NuGet packages:
Sitecore.DataExchange
Sitecore’s public NuGet feed is available at https://nuget.sitecore.com/resources/v3/index.json.
Implement a custom value mapping set
In the data synchronization process, a value mapping set controls the mapping of data from the source object to the target object. Normally, you configure the data mapping by assigning individual value mappings to the value mapping set. However, if the data mapping logic is very complex, you can control the data mapping through code instead. To do so, you must create a custom value mapping set that implements the code that determines the data mapping.
The code example in this topic implements the following data mapping logic:
- Read the Name property from the source object.
- Write it to the Description property on the target object.
- Set the current date on the LastUpdated property on the target object.
To create the custom value mapping set:
-
In Visual Studio, add the following class:
Create a template for a custom value mapping set
To configure the data synchronization process to use a custom value mapping set, you must create and configure a template.
Since all of your value mapping is done in code, there is no reason to allow users to add value mapping items under the custom value mapping set.
To add a new template and remove the option to insert value mappings:
-
In the Content Editor, navigate to Templates. On the ribbon, on the Home tab, in the Insert group, click New Template.
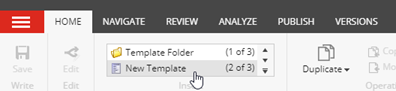
-
In the Select name dialog, enter the following values:
Name Custom Value Mapping Set Base template Templates/Data Exchange/Framework> Data Access > Mapping > Value Mapping Set -
Click Next. In the Location dialog, select Templates/Data Exchange/Framework/Data Access/Mapping.
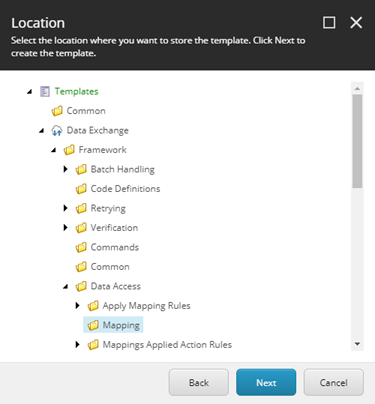
-
Click Next. In the confirmation dialog, click Close.
-
To set an icon for the new template, in the content tree, select the template, for example, Templates/Data Exchange/Framework/Data Access/Mapping/Custom Value Mapping Set.
-
In the right-hand pane, on the Content tab, click the icon next to title.
-
In the Change Icon dialog, in the Icon field, enter, for example, Office/32x32/vector_circle.png.
-
With the template item selected, on the ribbon, on the Builder Options tab, in the Template group, click Standard values.
-
With the new __Standard Values item selected, on the ribbon, on the Configure tab, in the Insert Options group, click Assign.
-
In the Insert Options dialog, in the list on the right, click Value Mapping.
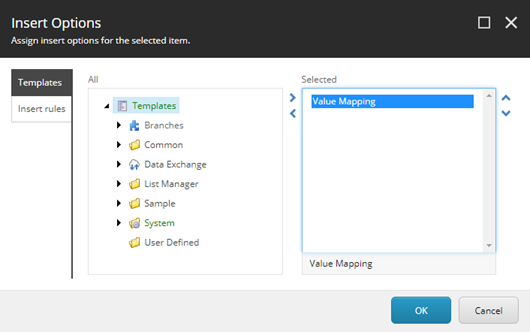
-
Click the left arrow (
 ) to remove Value Mapping from the Selected list. Click OK to save your changes.
Implement a converter for a custom value mapping set
In Data Exchange Framework, Sitecore items are only used for configuration. When a data synchronization process runs, the configuration is read from the Sitecore items and then converted into framework components.
You must implement a custom converter class using the item ID from the custom value mapping set template.
To implement the custom converter:
-
In the Content Editor, navigate to /sitecore/templates/Data Exchange/Framework/Data Access/Mapping/Custom Value Mapping Set.
-
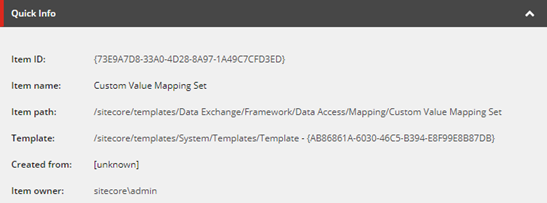
On the ribbon, on the Content tab, in the Quick Info section, copy the Item ID value.
-
To create the custom converter class, in Visual Studio, add the following class:
NoteIn the attribute SupportedIds, use the template item ID you copied in the previous step.
-
To deploy the code, build the Visual Studio project.
-
Copy the
Examples.DataExchange.dllfile to your Sitecore server.
Integrate a custom value mapping set
The final step is to integrate your custom value mapping set into Data Exchange Framework.
When configuring your data synchronization process, use your custom value mapping set when you create new tenants. For already existing tenants, replace the value mapping set currently used with your custom value mapping set.
To configure the template to use the custom converter and the custom value mapping set:
-
In the Content Editor, navigate to /sitecore/templates/Data Exchange/Framework/Data Access/Mapping/Custom Value Mapping Set/__Standard Values.
-
On the Configure tab, in the Data Exchange Framework section, set the following field values:
Field Value Converter Type Examples.DataExchange.CustomMappingSetConverter,Examples.DataExchange -
On the menu ribbon, on the Configure tab, in the Insert Options group, click Assign.
-
In the Insert Options dialog, in the tree on the left, navigate to Templates/Data Exchange/Framework/Data Access/Mapping/Custom Value Mapping Set. Click the right arrow (
 ) to add the set to the Selected list.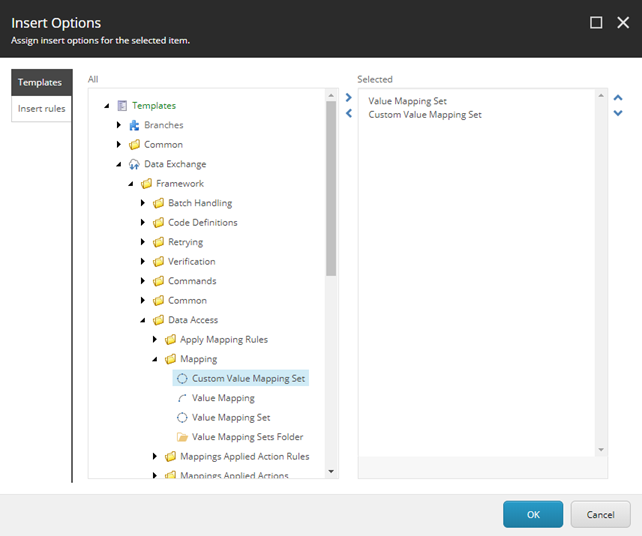
-
Click OK.