The Explore mode settings
In Explore mode, the Settings panel is on the left side of the webpage. The header displays the type of visit that you have selected for the visitor experience:
-
Journey mode – the preset values are the starting point for your visit. As you travel through the website, you accumulate engagement value points and you can monitor any changes that are made to the site, for example, through personalization.
-
Fixed mode – the preset values are permanent and will not change as you travel through the website. If you visit a page that contains personalization, you see the page change but all the changes are cleared when you move on to another page. You do not accumulate any engagement points during a Fixed mode visit.
When you are in Explore mode, the Experience Editor ribbon is disabled. To leave Explore mode and enable the Experience Editor ribbon, in the Settings panel, click Experience Editor.
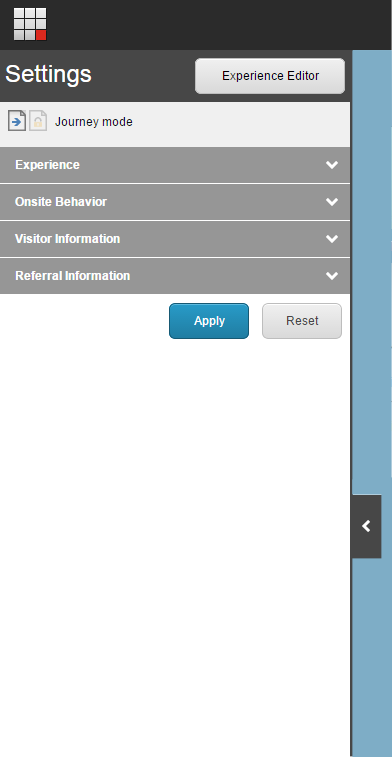
The following options are available in the Settings panel.
The Explore mode options described in this table can vary depending on how you have implemented your website. For example, when you install Sitecore, the only presets that are available are Default and Anonymous.
Experience
-
Preset, for example Default, Anonymous, or the presets you create - Select the preset that you want to use as you travel through the website. Each preset consists of a persona and some other settings that enable you to experience the website from the perspective of different types of visitors.
Onsite Behavior
-
Profiles that you created for the website, for example Visit Profile, Business, Couples, Duration, Family, Repeat visits, Tourism - You can add values to the existing profile keys for this visit.
NoteYou must create and configure profile values for each profile in the Marketing Control Panel.
-
A list of Goals, for example, Registration form completed, Frequent flyer form completed, or Facebook clicked - Select the goals that you would like to trigger during the visit.
-
A list of Page events, for example, Campaign, Download, Print, or RSS - Select the page events that you would like to trigger during the visit.
Visitor information
* For the GEOIP setting, if you select more than one option, for example, IP and Country, they could be in conflict. In this case, the Viewer panel only displays the information according to the IP address. If the IP address is not specified, the information is displayed according to Country.
-
A list of Devices, for example Default, Print, Feed, Mobile, or Tablet - Select the device that you want to use for the visit. The layout of the website changes depending on the specific device you use. For example, to experience the website from the perspective of a mobile visitor, you can select a Mobile device.
-
GEOIP Map* - Enter the GEOIP information that you want to use for this visit and click Apply. This information can be used for a MaxMind lookup. Click on the map to specify your location for the visit or enter the relevant latitude and longitude.
-
GEOIP Country* - Select the country that you want to use for the visit.
-
GEOIP IP* - Enter the IP address that you want to use for the visit.
Referral Information
-
A list of Campaigns, for example, Frequent flyer promotion campaign or Home for Holidays campaign - Search for or select the campaign that you want to trigger during the visit.
-
Referral requests field - Enter the URL of a website that links to your site. Alternatively, you can enter a keyword from a search engine such as Google or Bing.
If you want to change the order of the sections in the Settings panel or in the Viewer panel, contact a developer or administrator.
You can also use role-based permissions to hide or show specific sections in the panels. For example, you can create a dedicated Explore mode Marketer role that only has access to the GEOIP and Campaigns settings.