Change the layout of a page
Use the Experience Editor for the steps described in this topic.
Layouts use a responsive grid that divides pages into columns. You can use the Row Splitter and Column Splitter components to further define the page structure and divide the available space horizontally and vertically.
When you create a page, by default it includes the basic layout that contains three placeholders: header, main, and footer. You can add the Column Splitter or Row Splitter components to these placeholders. Finally, you add components to the newly added columns or rows.
You can also change the layout of your pages by changing the grid settings of the components.
Add a Column Splitter component
The Column Splitter component lets you add structure to your pages by dividing the pages into columns. The Column Splitter component is only a placeholder for other components and cannot hold any content alone. For example, to add text to a specific column, first you must add the Rich Text component to the column.
This topic describes how to use the Column splitter component in the Experience Editor. However, you can also use the component in Pages.
To add the Column Splitter component to a page:
-
Open the page, and then open the Toolbox.
-
From the Page Structure section, drag the Column Splitter component onto the placeholder that you want to add the component to. While dragging, the placeholder turns blue.
Alternatively, on the Home tab, click Component to open the Select a rendering dialog box.
-
On the floating toolbar, click
 Add a new column at the end of the splitter. To see the column you just added, click somewhere below the toolbar.
-
To add or rearrange columns, in the new toolbar, you can click:
- Add a new column
 - to add a column next to the currently selected column.
 - Move the selected column to the right
 - to move the currently selected column one position to the right.
 - Move the selected column to the left
 - to move the currently selected column one position to the left.
 - Remove the selected column
 - to remove the currently selected column.
- Add a new column
-
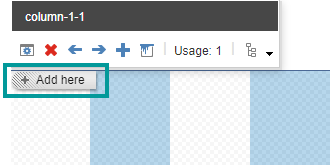
To add a component to a column, drag the component from the Toolbar, or select the column and then click Add here. For example, to insert the Image component to add a logo.
Add a Row Splitter component
The row splitter component lets you divide your pages into rows. The Row Splitter component is only a placeholder for other components and cannot hold any content alone. For example, to add text to a specific row, first you must add the Rich Text component to the row.
This topic describes how to use the Row splitter component in the Experience Editor. However, you can also use the component in Pages.
To add the Row Splitter component to a page:
-
Open the page, and then open the toolbox.
-
In the Page Structure section, drag the Row Splitter component onto the placeholder that you want to add the component to. While dragging, the placeholder turns blue.
Alternatively, on the Home tab, click Component to open the Select a rendering dialog box.
-
On the floating toolbar, click Add a new row at the end of the splitter. To see the row you just added, click somewhere below the toolbar.

-
To add or rearrange rows, in the new toolbar, you can click:
- Add a new row
 - to add a column next to the currently selected column.
 - Move the selected row down
 - to move the currently selected column one position to the right.
 - Move the selected row up
 - to move the currently selected column one position to the left.
 - Remove the selected row
 - to remove the currently selected column.
- Add a new row
-
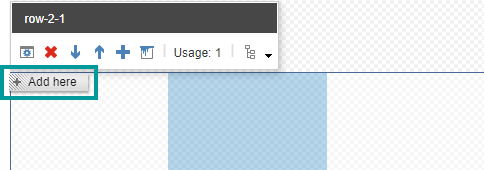
To add a component to a row, drag the component from the Toolbox, or select the row, and then click Add here.