Understanding chat
In Agentic studio, the Chat interface is where you work with AI and manage your conversations. It provides a conversational space where you can create, review, and continue work while preserving context and history.
As AI works on your request, progress details or reasoning summaries may be displayed to help you understand how the response or outcome was generated.
Generated artifacts appear directly in the conversation and are added to Context  in the Chat interface. You can open an artifact in the editing pane to review the content and copy, save, or export it.
Although the Chat interface can be accessed from different areas of SitecoreAI, the basic interaction flow is the same:
-
Enter a prompt.
-
Select an agent if the task is specific.
-
Add context, including artifacts and brand kits.
-
Select skills and tools.
-
Attach files to provide more information.
-
Submit your request.
-
Click the generated artifact to review, copy, save, or export the content.
Accessing the chat interface
You can access the Chat interface from several areas in SitecoreAI, depending on where you are working.
Overview page
On the Overview page, the Chat interface is located at the top of the page, giving you a quick way to start a chat from the main Agentic studio home page.
To begin a conversation, enter a prompt. Depending on the task, you can also select an agent, choose skills and tools, attach files, and specify the context you want AI to use.
After you submit the prompt, the conversation opens on the Chat page in a new chat.

Chat page
The Chat page provides the full chat experience. From here, you can start new chats, reopen previous conversations, review earlier work, and continue existing threads while preserving context and history.
To access it, in the navigation menu, click Agentic and, in the left sidebar, click  Chat.
Chat.

For more information about using the Chat page, see Using the Chat interface.
Space
In a Space, use the Chat interface at the bottom of the page to work with AI in the context of the space. You can enter prompts, refine outputs, request changes, and build on previous work over time.
Conversations and artifacts are stored together in the space, so you can return to the work later without losing context. Generated artifacts can also be used as context in future conversations, helping AI keep responses accurate and consistent.

Page builder
In Page builder, click the Agentic Studio  icon in the top toolbar to open the Chat interface.
In the right pane, use the Chat tab to enter a prompt, select an agent if needed, add context, and choose skills or tools. The chat uses the context of the site collection, site, or page currently open in the canvas. You can also run Page builder-compatible agents from the Run agents tab.

Anywhere in SitecoreAI
From anywhere in SitecoreAI, click the AI chat icon in the upper-right corner of the page to open the Chat interface.
This gives you access to chat regardless of where you are working, so you can ask for help, continue a conversation, or use AI without leaving your current workflow.
Available views in the Chat interface
The Chat interface includes three views. Choose the view that best fits how you want to navigate conversations and complete tasks.
-
Chat - displays chats in a conversational format. This is the default view and is used across Agentic studio.
-
Classic - lists chats and agents in a table format, with view capability for each row.
-
Canvas - provides an open workspace with movable chat cards and easy access to editing features.
Artifacts generated by agents appear directly in the conversation and can be selected as reusable context for future steps.
Using the Chat interface
The Chat interface gives you access to the core AI tools available across SitecoreAI. For more information, see Chat features and tools.
In the Chat interface, you can:
-
Enter a prompt or use a suggested prompt to begin working with AI. You can ask questions, generate content, or ask AI to perform tasks in SitecoreAI using available tools, such as creating, updating, or translating content.
-
Select an agent, if the task requires one.
-
Refine your request by editing your prompt, choosing skills and tools, uploading files, and adding context such as artifacts and brand kits.
-
Continue a conversation by asking follow-up questions or refining previous outputs.
-
Reuse earlier responses and AI-generated artifacts as context for follow-up work.
-
Use agent sequencing to run additional agents without restarting the task.
-
Open generated artifacts to review, copy, save, or export the content.
-
Review and apply proposed changes before AI-created, translated, or edited content is saved.
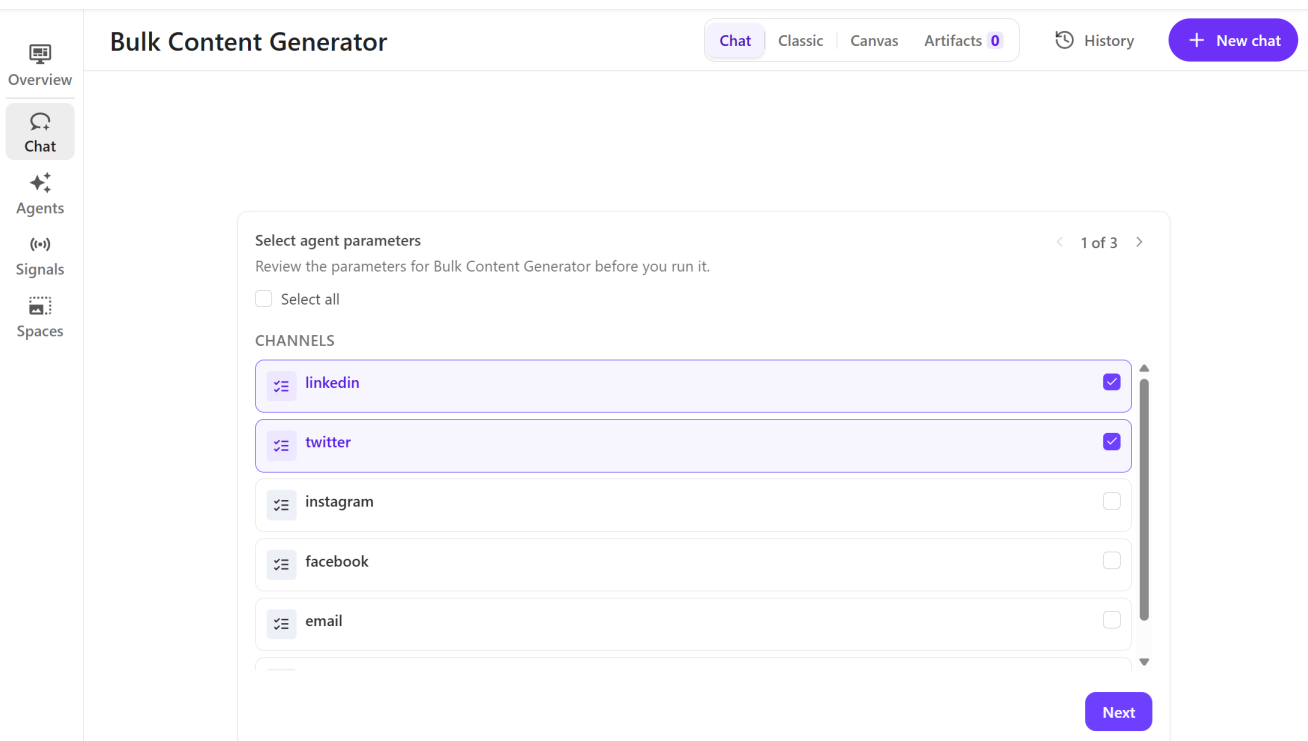
When you select a prebuilt agent from the Chat interface, you might be prompted to provide additional information before the agent runs. For example, if you choose Bulk Content Generator, SitecoreAI prompts you to review and select the required parameters.
Managing chats on the Chat page
The Chat page includes additional options for managing conversations.
On the Chat page, you can:
-
Start a new chat by clicking
 New chat.
 -
Browse your chat history by clicking
 History in the upper-right corner of the Chat page.
 -
Search chat history by entering a keyword in the Search history field. To narrow results, select a prebuilt agent from the drop-down list.
-
Convert a chat into a space for collaboration.
-
Delete a chat by opening chat history and clicking
 Delete next to the chat you want to remove.
 -
Rename a chat by opening chat history and clicking
 . Rename next to the chat you want to rename.
 -
Use the debugging tool to help you troubleshoot issues with chats.