Personalize a component
Use component personalization to show different component variants to different visitors based on targeting criteria such as visitor profile data, conditions, or custom values.
To do this, configure the component’s decision table by defining inputs, creating rules, and configurng the corresponding component variant for each rule.
To personalize a component in SitecoreAI:
Select a component to personalize
Select the page component you want to personalize. The personalization rules and component variants you configure apply only to this component.
Component personalization is shared across page versions. If you edit personalization rules in one page version, the changes also apply to other versions, including the live version.
To select a component:
-
In the Page builder Editor mode, open the page containing the component you want to personalize.
-
Select the component (for example, the Page Header).
-
In the context toolbar, click Add personalization rules to component
 .
.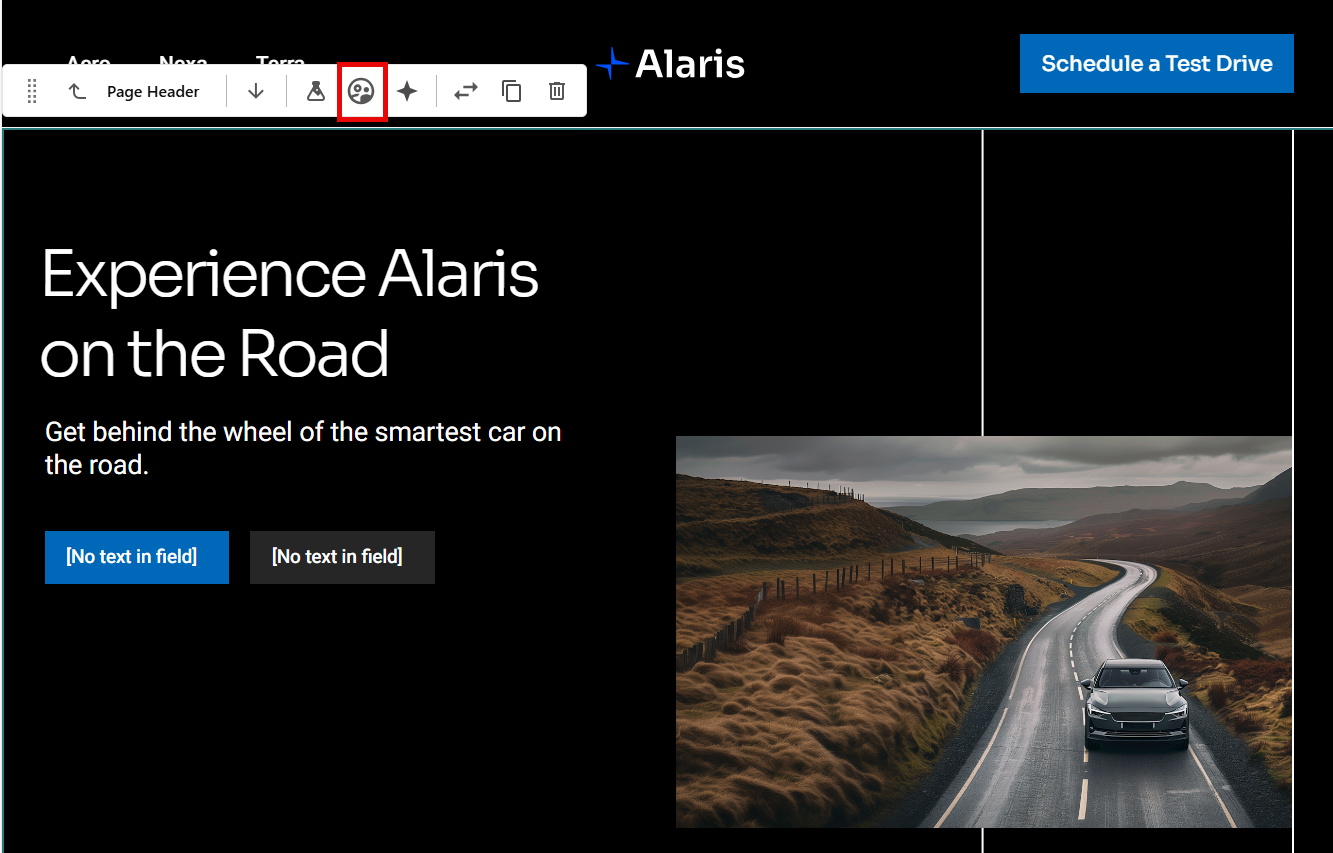
The personalization dialog for the selected component opens. Here, you can define the decision table inputs and rules.
Define decision table inputs
Decision table inputs define the data (such as location, device type, birthday) that personalization rules use to evaluate visitors and determine which component variant they see.
To define decision table inputs:
-
In the personalization dialog, on the Builder tab, click Create table .
-
Select an input type:
-
Profile data - visitor profile attributes stored in SitecoreAI.
-
Condition - out-of-the-box or custom conditions in in SitecoreAI..
-
Custom value - JavaScript-based values created for advanced targeting scenarios beyond profile data or conditions.
-
-
Depending on the selected type, configure the input:
-
Profile data - select a profile attribute to use, such as Country, Gender, or Email.
-
Condition - select an out-of-the-box condition or a custom condition then configure how it is evaluated. For example, Country is not Denmark.
-
Custom value, - select an out-of-the-box custom value such as First Page or Top Affinity or a custom value created, including its scope.
-
-
Click Save. The selected input appears as a new column in the decision table.
-
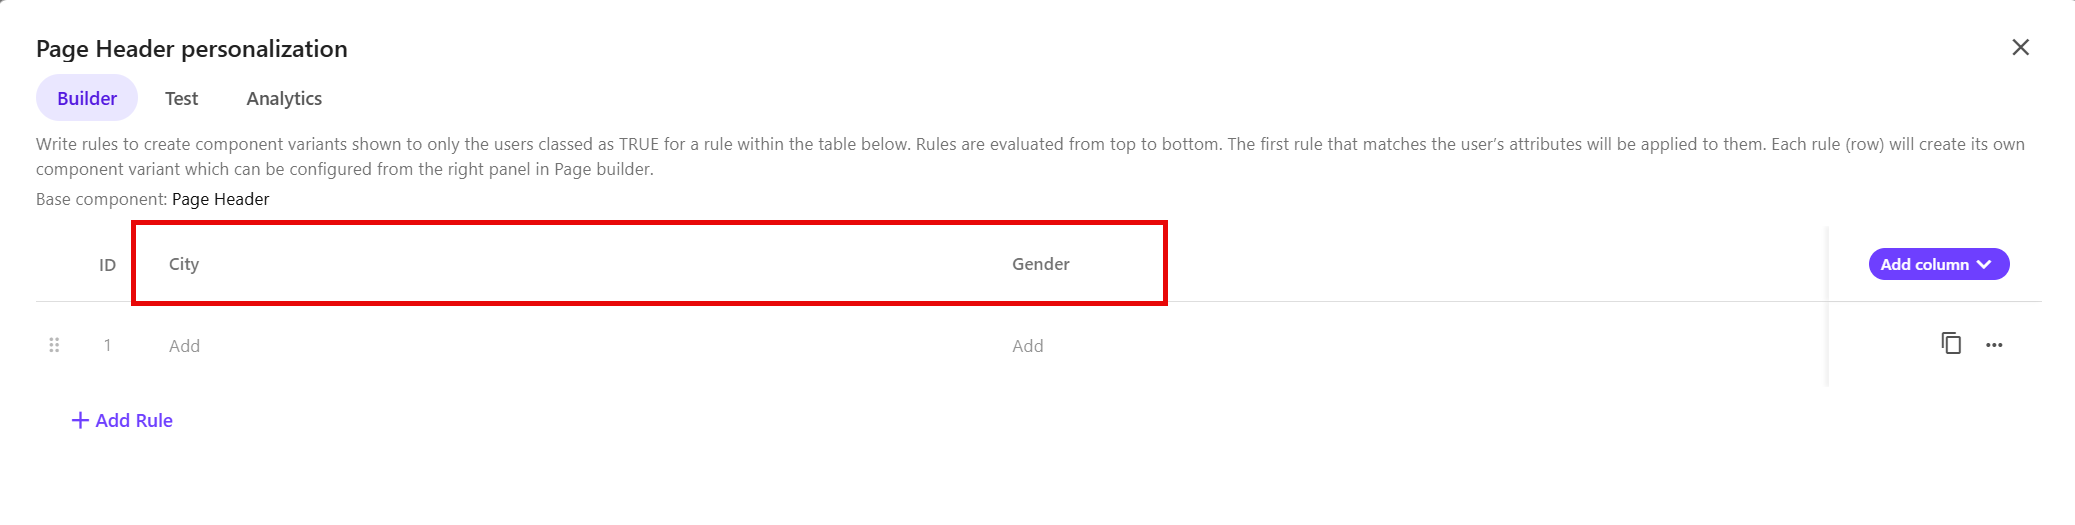
To add more inputs to the decision table, click Add column and repeat these steps.
Multiple inputs are combined using an
ANDcondition.For example, you can target visitors by both city and gender. These inputs appear as separate columns in the decision table.
Create personalization rules
Personalization rules in the decision table define how visitors are matched to different component variants based on the inputs you configured.
To create personalization rules:
-
In the first row of the decision table, click Add.
-
For each input column, select a comparator, enter the comparison value, then click Confirm.
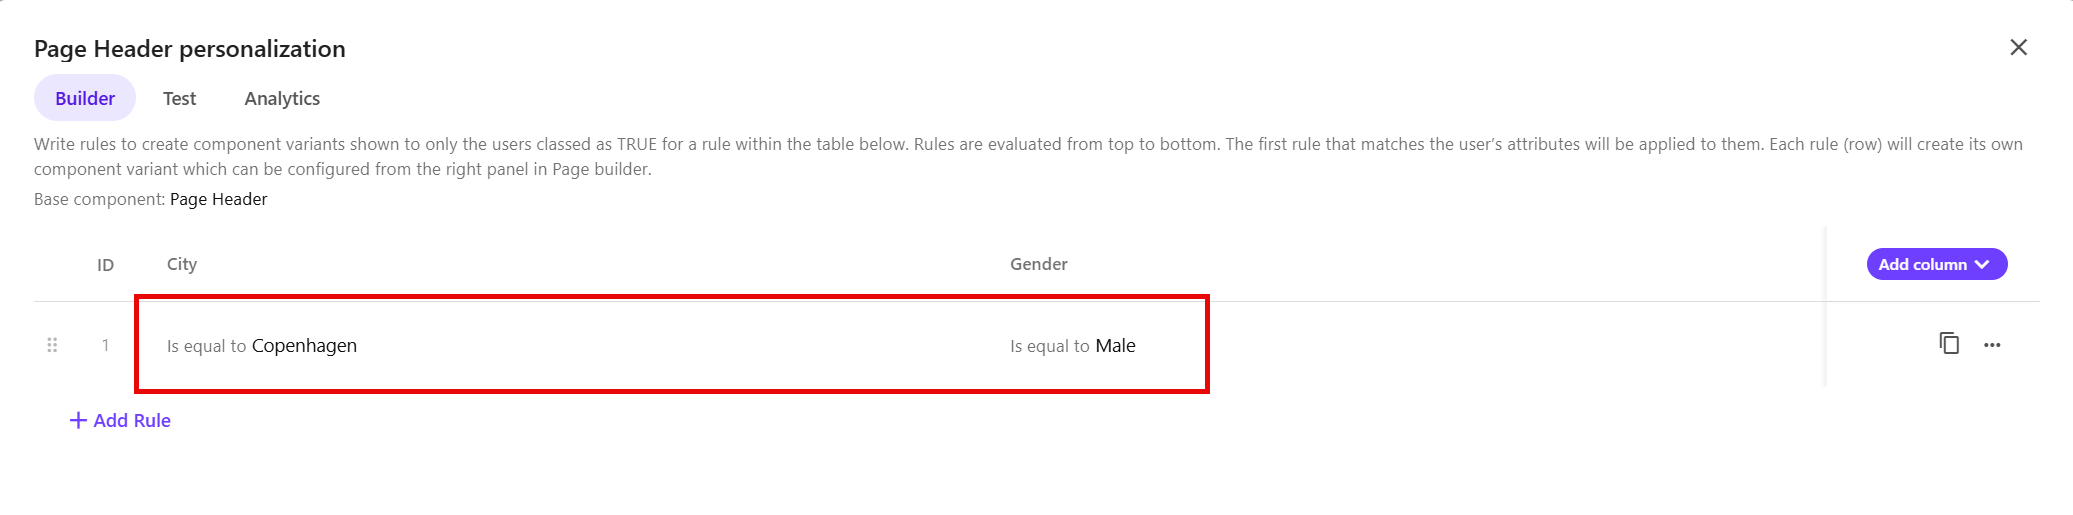
For example, to target male visitors from Copenhagen, configure the relevant input columns as follows:
-
City is equal to
Copenhagen -
Gender is equal to
Male
This combination appears as a rule in the decision table.
-
-
To add more personalization rules, click Add Rule and repeat these steps.
-
Optionally, you can:
-
Manage inputs and rules in the decision table to reorder, delete, duplicate or fill them with default values.
-
Test personalization rules against a visitor profile to verify behavior.
-
-
Click Save & close.
After saving, the page displays the original component and the personalization is marked with a Draft status.
Configure variants for each rule
Each personalization rule creates a corresponding component variant. After saving your personalization inputs and rules, configure the component variant shown to visitors who match each rule.
To configure component variants:
-
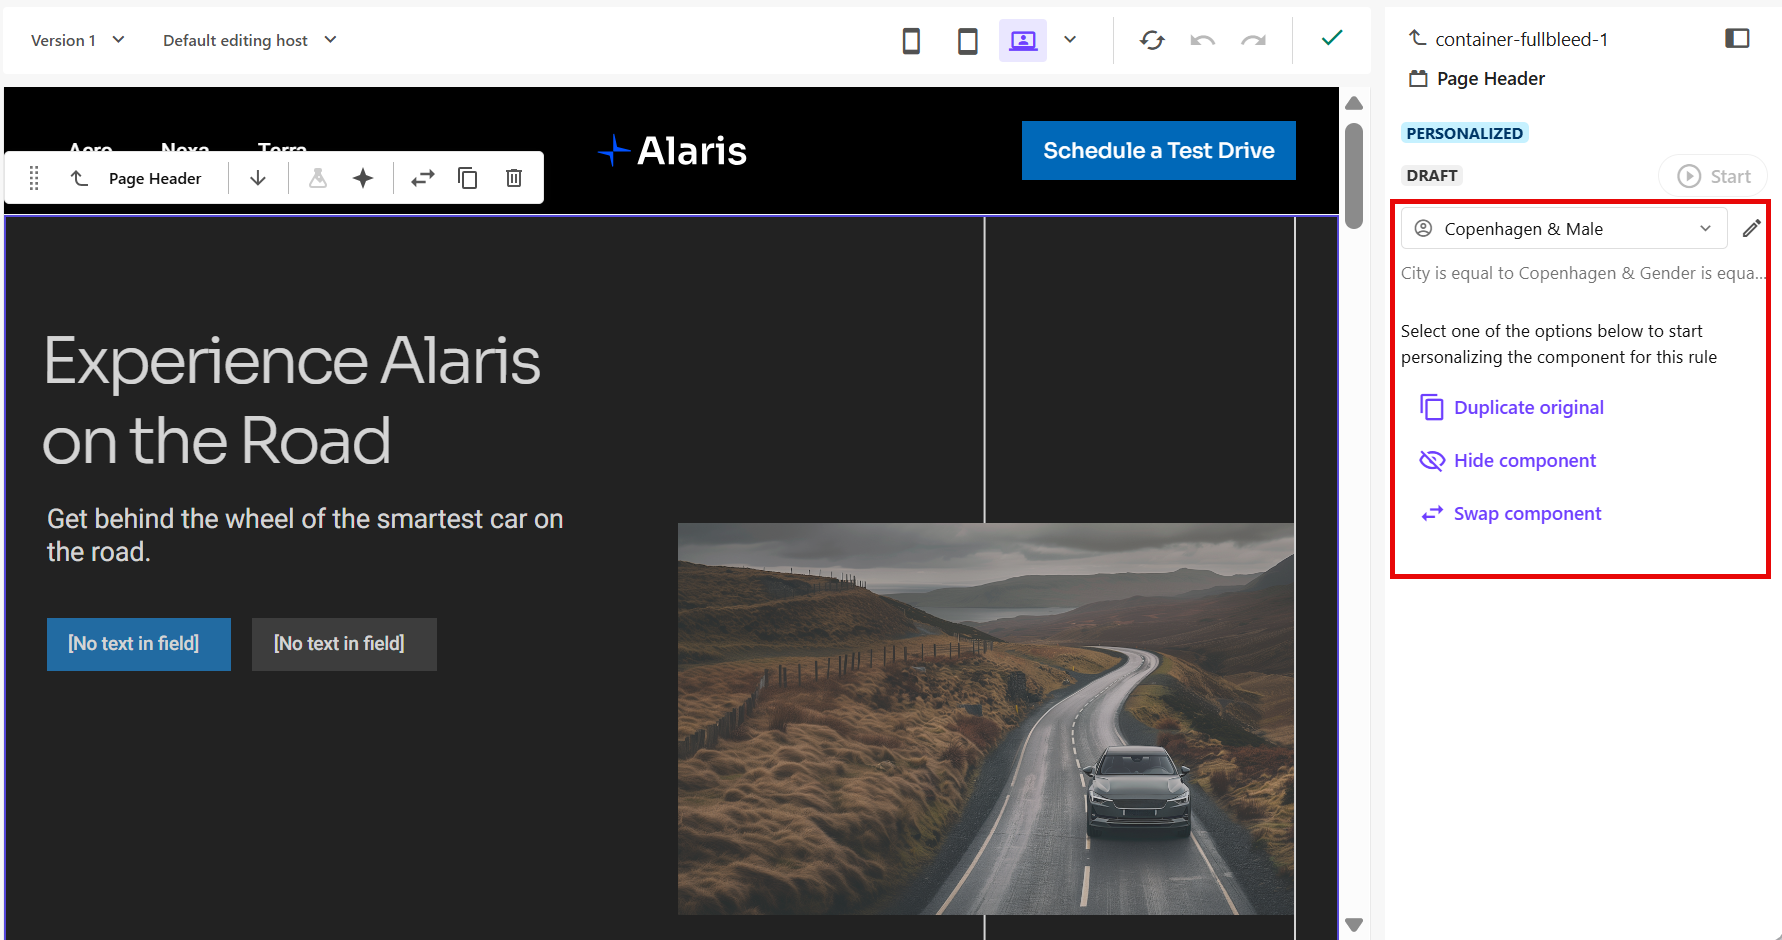
In the right pane, select the component variant you want to configure.
For example, select the first variant below the Original component.
-
For each component variant, choose one of the following options to configure its content:
-
Duplicate original - create a copy of the original component as a starting point.
-
Hide component - do not display the component for this variant.
-
Swap component - replace the component with another compatible component.
-
-
Update the content and design as needed.
-
Repeat these steps until all component variants are configured.
-
Optionally, click the preview icon
 to preview a variant.
When you are ready, publish the page and start the personalization to make the component variants available to visitors.