Walkthrough: Setting up a Marketing Automation activity for Salesforce
If you installed the Tenant Service with the Salesforce Marketing Cloud Behavioral Data Exchange connector, you can set up an Salesforce Marketing Cloud (SFMC) activity for Marketing Automation (MA) that allows you to use an MA engagement plan to trigger a synchronization between Sitecore and SFMC.
Before you set up an SFMC activity for MA, you must have set up the Tenant Service to work with SFMC.
This walkthrough describes how to:
-
Create an SFMC tenant
-
Configure connection strings on a Marketing Automation service server
-
Connect the Tenant Service to an engagement plan
-
Set up synchronization to either an SFMC Centralized Data Extension or an SFMC Centralized Data Extension and a journey.
Create an SFMC tenant
Create an SFMC tenant
The tenant is a container for the settings you must configure for the service.
To create a Salesforce Marketing Cloud (SFMC) tenant:
-
On the Sitecore Launchpad, open the Content Editor.
-
Go to /sitecore/system/Data Exchange and right-click Data Exchange.
-
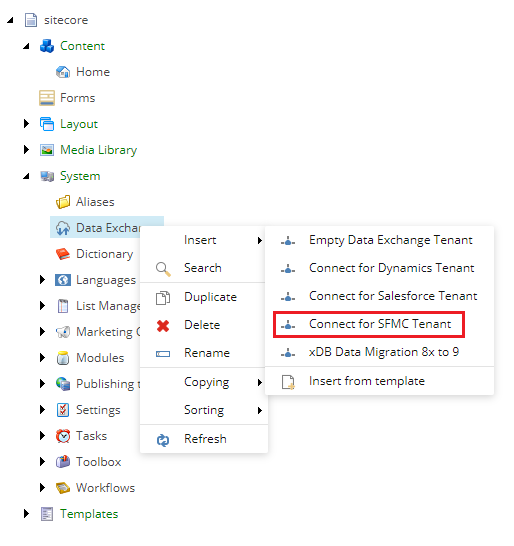
On the Insert menu, click Connect for SFMC Tenant.
-
Go to /sitecore/system/Data Exchange/<tenant name>. On the Content tab, in the Administration section, click Enabled.

-
Make a note of the tenant ID. You need it to configure the connection string.
-
Save the item.
If you have an XPScaled instance, you must also:
-
Go to
<tenant name>/Endpoints/Providers/xConnect/xConnect Client Endpoint. -
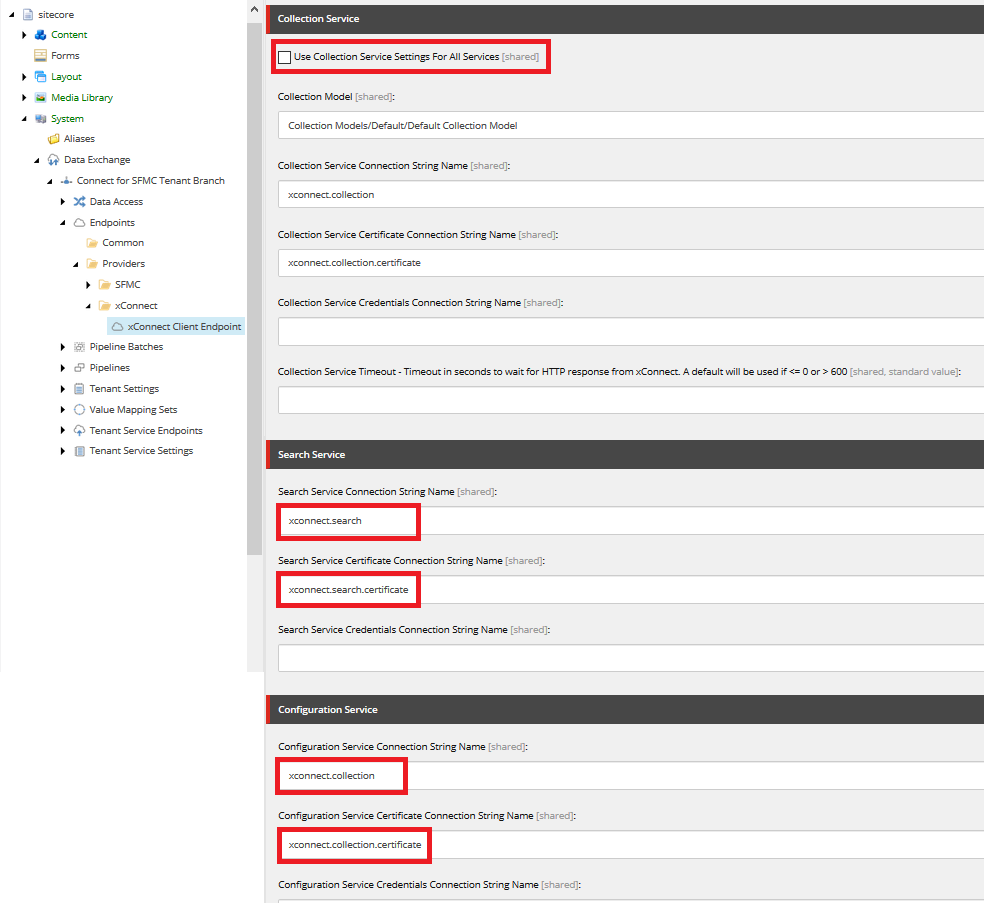
Clear the Use Collection Service Settings For All Services check box.
-
Fill in the following fields:
Section
Field
Value
Search Service
Search Service Connection String Name
xconnect.search
Search Service
Search Service Certificate Connection String Name
xconnect.search.certificate
Configuration Service
Configuration Service Connection String Name
xconnect.collection
Configuration Service
Configuration Service Certificate Connection String Name
xconnect.collection.certificate
The settings should now look like this:
-
Save the item.
Configure connection strings on a Marketing Automation service server
Configure connection strings on a Marketing Automation service server
You must configure connections between your Tenant Service server and your Marketing Automation service server.
To configure connection strings:
-
On your Marketing Automation service server, open the
<Marketing Automation Service>\App_Data\jobs\continuous\AutomationEngine\App_Config\ConnectionStrings.configfile. -
Add a connection string for the Tenant Service. For example:
NoteIn the example, replace https://sc10.service with the name of your Tenant Service
Connect the Tenant Service to an engagement plan
Connect the Tenant Service to an engagement plan
To activate the Marketing Automation, you must connect the Tenant Service to an engagement plan.
For this topic, it is assumed that you are familiar with how Marketing Automation and engagement plans work.
To create a connection:
-
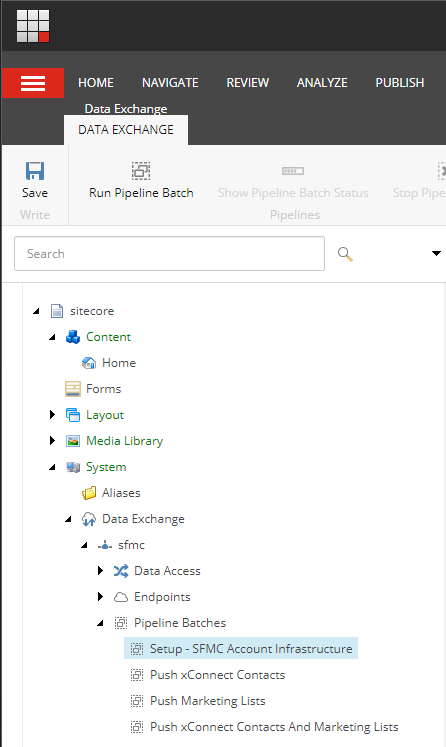
Create the SFMC centralized data extension in SFMC, if it does not already exist, by running the Setup – SFMC Account Infrastructure pipeline batch in your SFMC tenant. This generates the necessary xConnect data extension template in SFMC.
-
On your Sitecore content management instance, open the
<sitename>\App_Config\Sitecore\MarketingAutomation\Sitecore.DataExchange.MarketingAutomation.Client.configfile. -
In the
<tenantServiceConnectionRepository>/<tenantServices>node, add the name of the Tenant Service . For example: -
On the Sitecore Launchpad, open the Marketing Automation application.
-
Create a new campaign, or select an existing campaign if you already have one. Configure the start point to trigger the campaign when a customer visits a specific page or when a general
PageViewevent happens. For testing, you can select the Instant demo goal. Click Apply. -
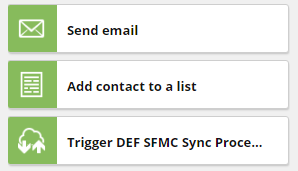
From the toolbox, drag and drop a Trigger DEF SFMC Sync Process marketing action to the campaign.
-
Click the Trigger DEF SFMC Sync Process action. In the Select a Tenant Service field, select a Tenant Service.
NoteYou can configure the list of available Tenant Services in the
<sitename>\App_Config\Sitecore\MarketingAutomation\Sitecore.DataExchange.MarketingAutomation.Client.configconfiguration file. -
Click Apply.
Synchronize to SFMC centralized data extension
Synchronize to SFMC centralized data extension
To synchronize contacts to the SFMC centralized data extension:
-
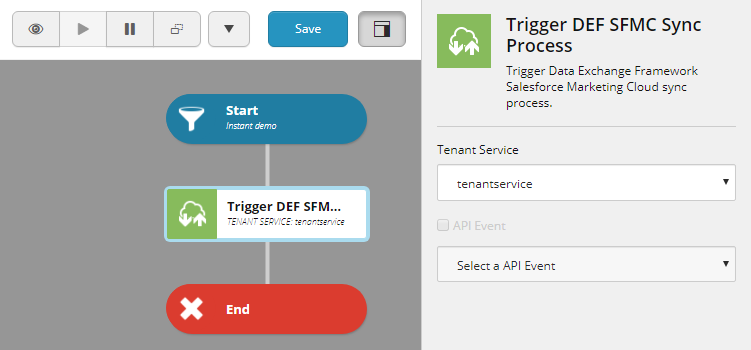
Select the Trigger DEF SFMC Sync Process action in the campaign. Clear the API Event check box.
-
Click Apply.
-
Save the campaign and Activate it.
-
To activate the campaign, click the Play icon.

To test the synchronization:
-
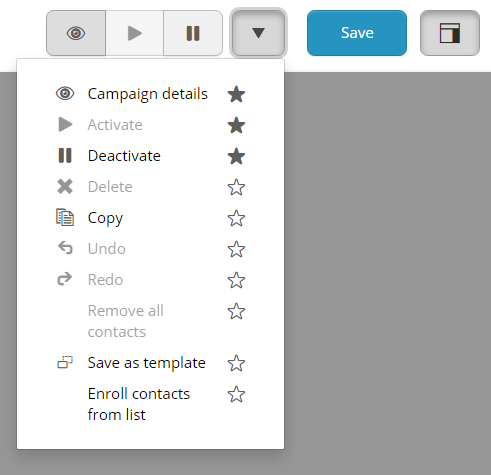
Click the Down arrow icon. Click Enroll contacts from list.
-
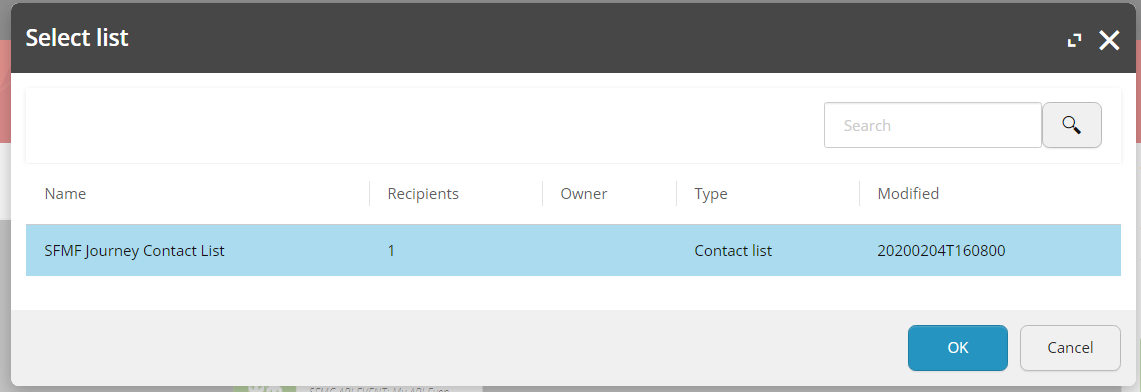
Select the contact list that you want to synchronize to SFMC and click OK.
-
Log in to your SFMC website portal.
-
Navigate to the centralized data extension at
\Audience Builder\Contact Builder\Data Extensions\Sitecore\xDB Contact, and confirm that the synchronization has updated the contacts.
Synchronize to the SFMC centralized data extension and a journey
Synchronize to the SFMC centralized data extension and a journey
Before you can configure the synchronization process from Sitecore Marketing Automation to Salesforce Marketing Cloud (SFMC) Journey, you must create a journey in SFMC using Journey Builder. Set the entry source for the journey as an API event.
Sitecore synchronizes contacts with the Xconnect contact template fields format. When you create a journey in SFMC with the entry source as an API event, you must have a data extension where you can design the data extension yourself. You must include contactKey in your data extension. If contactKey is not included, SFMC raises an error.
When you create the journey in SFMC, you must use a different data extension from the xDB contact, or create a new one.
To synchronize contact data to the SFMC centralized data extension and API event data extension via a journey:
-
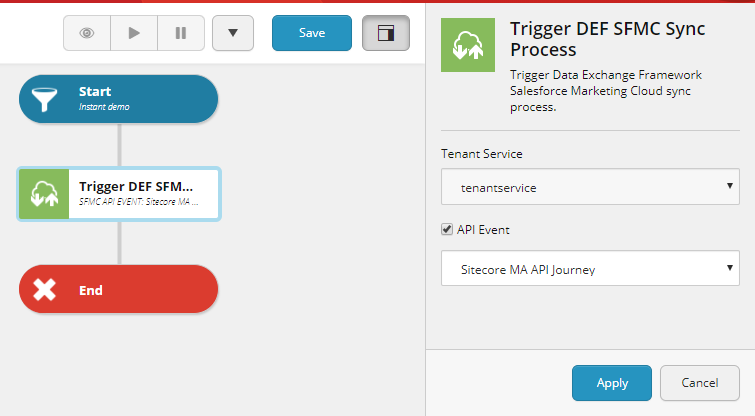
In the Sitecore Marketing Automation action, add a Trigger DEF SFMC Sync Process action into a plan, select the API Event check box and, in the drop-down list, select the API event of the journey that you want to trigger.
 Note
NoteThe list of API events is retrieved from SFMC Journey Builder, Activity Name.
-
Click Apply.
-
Save the campaign and click Activate the current campaign (
 ) to activate it.
To test the synchronization:
-
Click Drop-down (
 ) and select Enroll contacts from list.
-
In the Select list dialog box, select the contact list that you want to synchronize to SFMC, and click OK.
NoteThe contacts are synchronized to both the SFMC centralized data extension and the selected SFMC journey data extension.
-
Log in to your SFMC website portal.
-
Navigate to the centralized data extension,
\Audience Builder\Contact Builder\Data Extensions\Sitecore\xDB Contact.NoteThere can be duplicate Activity Names in SFMC. So if you have duplicate names, they are also included in the list.