Manage custom values
Custom values are reusable JavaScript-based inputs that you can use in decision tables for component personalization. Manage them by testing, publishing, duplicating, or deleting them.
Test a custom value
Test custom values to verify that they return the expected results before using them in decision tables. We recommend testing custom values before publishing them.
To test a custom value
-
On the Custom Values page, open the custom value you want to test.
-
Click Test.
-
In the test dialog, choose the profile to use for testing:
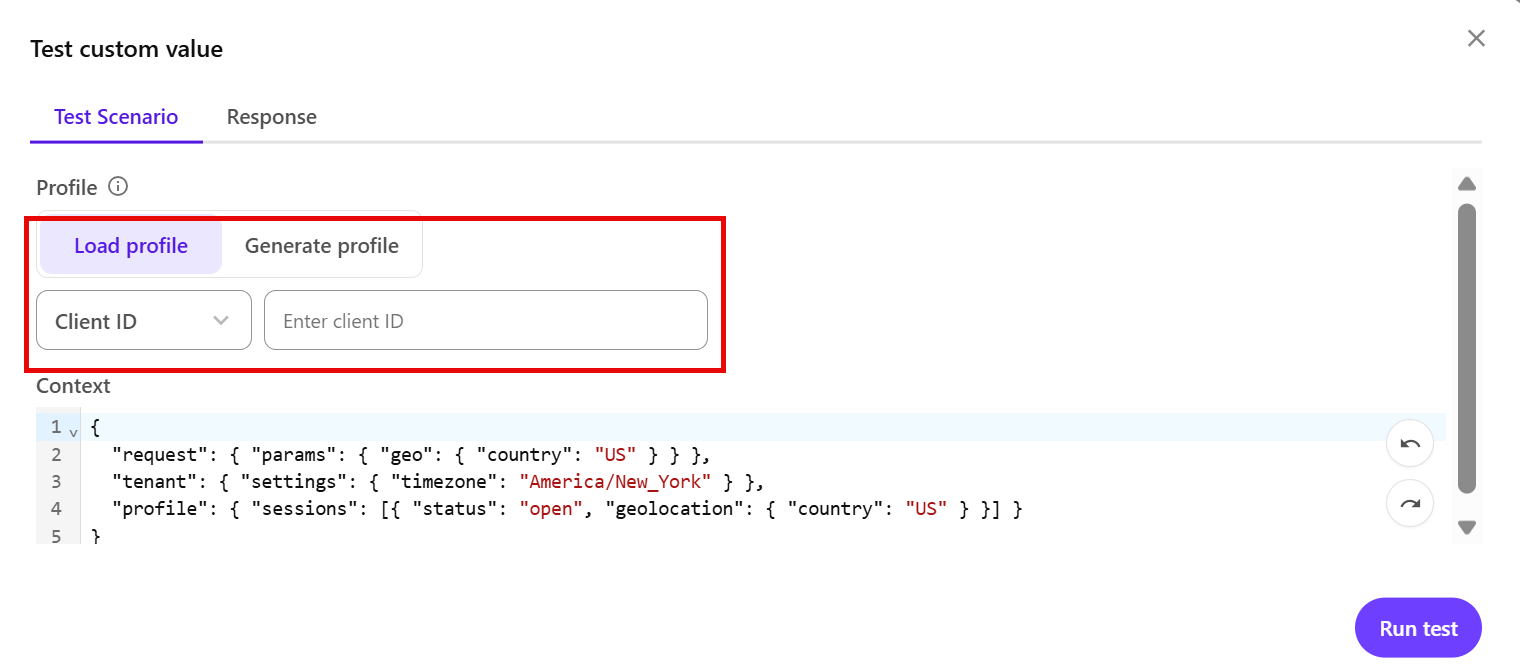
-
Load profile - enter the visitor's client ID or profile ID.
You can retrieve this from the JSON data in the profile details when using inspect mode. For more information, see Search for a profile.
-
Generate profile - use AI to generate a visitor profile using a natural language prompt.
-
-
If you selected Generate profile:
-
Enter a prompt describing the profile you want to test against.
Example: A female visitor from Copenhagen
-
Click Generate.
-
-
The generated or loaded profile is displayed in the Context section. Click Run test to start testing.
-
On the Response tab, review the returned test results.
Publish a custom value
Publish a custom value to make it available for use as an input in component personalization decision tables.
To publish a custom value:
-
On the Custom Values page, open the draft custom value you want to publish.
-
Click Publish.
-
Click Confirm publish.
The custom value status changes to Published. You can now use it as an input in a decision table.
Duplicate a custom value
Duplicate a custom value to create a copy that you can modify without changing the original.
To duplicate a custom value:
-
On the Custom Values page, open the custom data you want to duplicate.
-
Click the vertical ellipsis icon
 > Duplicate custom data.
 -
Enter a name for the custom value.
-
Click Create.
-
Make any required changes in the code editor.
-
Click Save.
Delete a custom value
Delete custom values that are no longer needed. This action is permanent and cannot be undone.
To delete a custom value:
-
On the Custom Values page, open the custom data you want to delete.
-
Click the vertical ellipsis icon
> Delete custom value -
In the confirmation dialog, click Delete custom value.