Walkthrough: Creating custom facets and events
This walkthrough is part five of the Extending the xConnect collection model walkthrough series. To complete this walkthrough, you must first complete walkthroughs part one, two, three, and four.
In this walkthrough, you are Sitecore Cinema, and you must extend the collection model to collect information from your visitors. The information relies on visitors swiping their loyalty card each time they interact with one of your cinemas, and as an incentive to visit, you offer free popcorn after 10 uses of the loyalty card.
The walkthrough describes how to:
- Create the
SitecoreCinemasolution and class library project - Create the
CinemaInfointeraction facet class - Create the
CinemaVisitorInfocontact facet class - Create the
WatchMovieoutcome item - Create the
WatchMovieoutcome class - Create the
BuyConcessionsoutcome item - Create the
BuyConcessionsoutcome class - Create the
UseSelfServiceevent item - Create the
UseSelfServiceevent class - Create the
SitecoreCinemaModelcollection model class - Create the
Console.Deployconsole app project - Serialize
SitecoreCinemaModelcollection model - Create the
Console.Journeyconsole app project - Simulate a Sitecore Cinema visit
In Sitecore 9.1.0, in the Sitecore.Xdb.Common.Web namespace:
-
Certificate**WebRequest**HandlerModifierOptionsbecameCertificate**HttpClient**HandlerModifierOptions. -
Certificate**WebRequest**HandlerModifierbecameCertificate**HttpClient**HandlerModifier.
Create the SitecoreCinema solution and class library project
To create the SitecoreCinema solution and class library project:
-
In Visual Studio with administrator privileges, create a new solution and class library project for .NET Framework called
SitecoreCinema: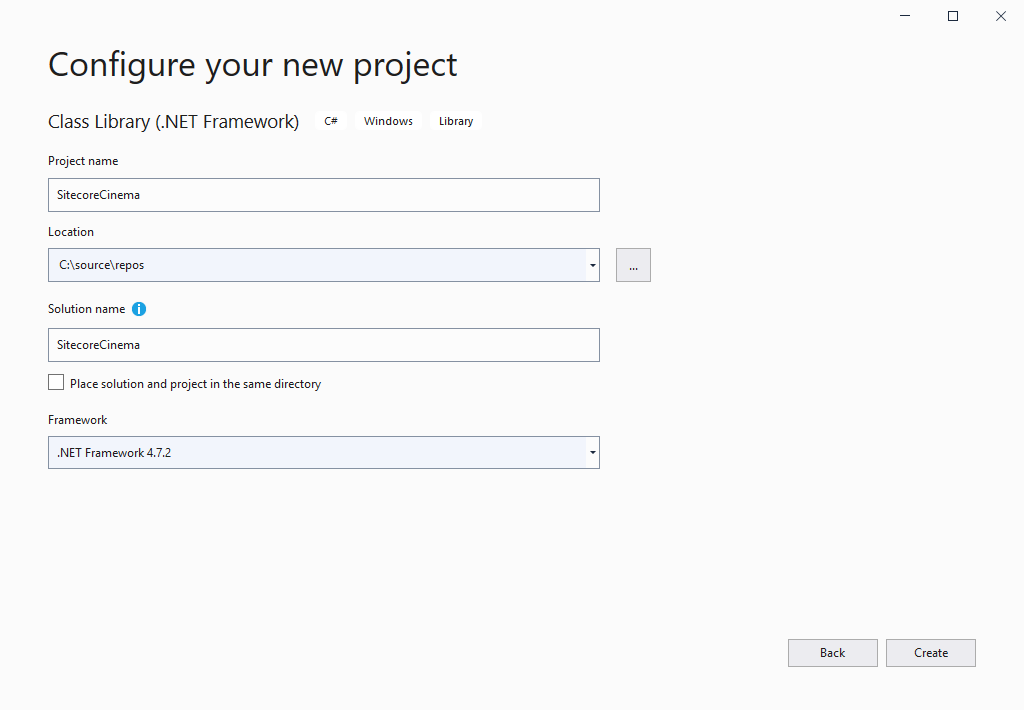
-
In Solution Explorer, right-click
SitecoreCinema/Referencesand click Add Reference. -
In the Reference Manager window, click Browse and add the following references from your
<xConnect instance>\bin\folder:Sitecore.XConnect.Collection.Model.dllSitecore.XConnect.CoreSitecore.XConnect.dll
-
Click OK.
Create the CinemaInfo interaction facet class
The CinemaInfo class is an interaction facet that contains information about the cinema visited during the interaction.
To create the CinemaInfo interaction facet class:
-
In Visual Studio with administrator privileges, in Solution Explorer, right-click the
SitecoreCinemaproject and click Add, New Item. -
In the Add New Item window:
- In the left pane, click
Installed/Visual C# Items. - In the middle pane, click Class.
- At the bottom, in the Name field, enter
CinemaInfo.csand click Add.
- In the left pane, click
-
In the
CinemaInfo.csfile, replace the content with the following code: -
Save the
CinemaInfo.csfile.
Create the CinemaVisitorInfo contact facet class
The CinemaVisitorInfo class is a contact facet that contains information about the visitor, such as loyalty ID.
To create the CinemaVisitorInfo contact facet class:
-
In Visual Studio with administrator privileges, in Solution Explorer, right-click the
SitecoreCinemaproject and click Add, New Item. -
In the Add New Item window:
- In the left pane, click
Installed/Visual C# Items. - In the middle pane, click Class.
- At the bottom, in the Name field, enter
CinemaVisitorInfo.csand click Add.
- In the left pane, click
-
In the
CinemaVisitorInfo.csfile, replace the content with the following code: -
Save the
CinemaVisitorInfo.csfile.
Create the WatchMovie outcome item
To create the WatchMovie outcome item:
- In the Marketing Control Panel, click Marketing Control Panel/Outcomes.
- In the Options pane, click Outcome Definition.
- In the Message window, enter
WatchMovieand click OK. - In the Quick Info section, make a note of the item ID.
Create the WatchMovie outcome class
The WatchMovie outcome class triggers the WatchMovie outcome item from the Point-of-Sale system when the visitor buys a movie ticket.
To create the WatchMovie outcome class:
-
In Visual Studio with administrator privileges, in Solution Explorer, right-click the
SitecoreCinemaproject and click Add, New Item. -
In the Add New Item window:
- In the left pane, click
Installed/Visual C# Items. - In the middle pane, click Class.
- At the bottom, in the Name field, enter
WatchMovie.csand click Add.
- In the left pane, click
-
In the
WatchMovie.csfile, replace the content with the following code: -
Insert the
WatchMovieoutcome item ID. -
Save the
WatchMovie.csfile.
Create the BuyConcessions outcome item
To create the BuyConcessions outcome item:
- In the Marketing Control Panel, click Marketing Control Panel/Outcomes.
- In the Options pane, click Outcome Definition.
- In the Message window, enter
BuyConcessionsand click OK. - In the Quick Info section, make a note of the item ID.
Create the BuyConcessions outcome class
The BuyConcessions outcome class triggers the BuyConcessions outcome item from the Point-of-Sale system when the visitor buys concessions.
To create the BuyConcessions outcome class:
-
In Visual Studio with administrator privileges, in Solution Explorer, right-click the
SitecoreCinemaproject and click Add, New Item. -
In the Add New Item window:
- In the left pane, click
Installed/Visual C# Items. - In the middle pane, click Class.
- At the bottom, in the Name field, enter
BuyConcessions.csand click Add.
- In the left pane, click
-
In the
BuyConcessions.csfile, replace the content with the following code: -
Insert the
BuyConcessionsoutcome item ID. -
Save the
BuyConcessions.csfile.
Create the UseSelfService event item
To create the UseSelfService event item:
- In the Marketing Control Panel, click Marketing Control Panel/Events.
- In the Options pane, click Event.
- In the Message window, enter
UseSelfServiceand click OK. - In the Quick Info section, make a note of the item ID.
Create the UseSelfService event class
The UseSelfService event class triggers the UseSelfService event item from the ticket machine when the visitor buys a movie ticket.
To create the UseSelfService event class:
-
In Visual Studio with administrator privileges, in Solution Explorer, right-click the
SitecoreCinemaproject and click Add, New Item. -
In the Add New Item window:
- In the left pane, click
Installed/Visual C# Items. - In the middle pane, click Class.
- At the bottom, in the Name field, enter
UseSelfService.csand click Add.
- In the left pane, click
-
In the
UseSelfService.csfile, replace the content with the following code: -
Insert the
UseSelfServiceevent item ID. -
Save the
UseSelfService.csfile.
Create the SitecoreCinemaModel collection model class
To create the SitecoreCinemaModel collection model class:
-
In Visual Studio with administrator privileges, in Solution Explorer, right-click
SitecoreCinemaand click Add, New Item. -
In the Add New Item window:
- In the left pane, click
Installed/Visual C# Items. - In the middle pane, click Class.
- At the bottom, in the Name field, enter
SitecoreCinemaModel.csand click Add.
- In the left pane, click
-
In the
SitecoreCinemaModel.csfile, replace the content with the following code: -
Save the
SitecoreCinemaModel.csfile.
Create the Console.Deploy console app project
The Console.Deploy console app serializes SitecoreCinemaModel to JSON format.
To create the Console.Deploy console app project:
-
In Visual Studio with administrator privileges, right-click the
SitecoreCinemasolution and click Add, New Project to create a new console app project for .NET Framework calledConsole.Deploy: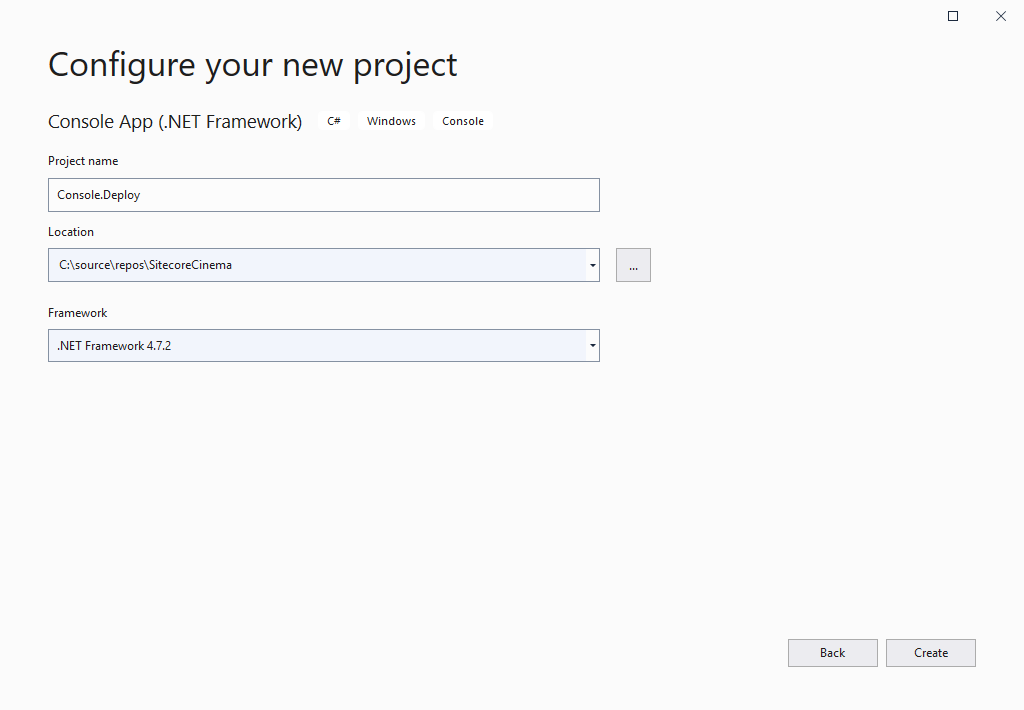
-
In Solution Explorer, right-click
Console.Deploy/Referencesand click Add Reference. -
In the Reference Manager window, on the Projects tab, select
SitecoreCinema. -
In the Reference Manager window, click Browse and add the following references from your
<xConnect instance>\bin\folder:Sitecore.XConnect.Core.dllSitecore.XConnect.dll
-
Click OK.
-
In Solution Explorer, double-click the
Console.Deploy/Program.csfile. -
In the
Program.csfile, replace the content with the following code: -
Save the
Program.csfile.
Serialize the SitecoreCinemaModel collection model
To serialize the SitecoreCinemaModel collection model:
-
In Visual Studio with administrator privileges, in Solution Explorer, right-click the
Console.Deployproject and click Set as Startup Project. -
Click Start to run the
Console.Deployapp and wait for it to serialize the model: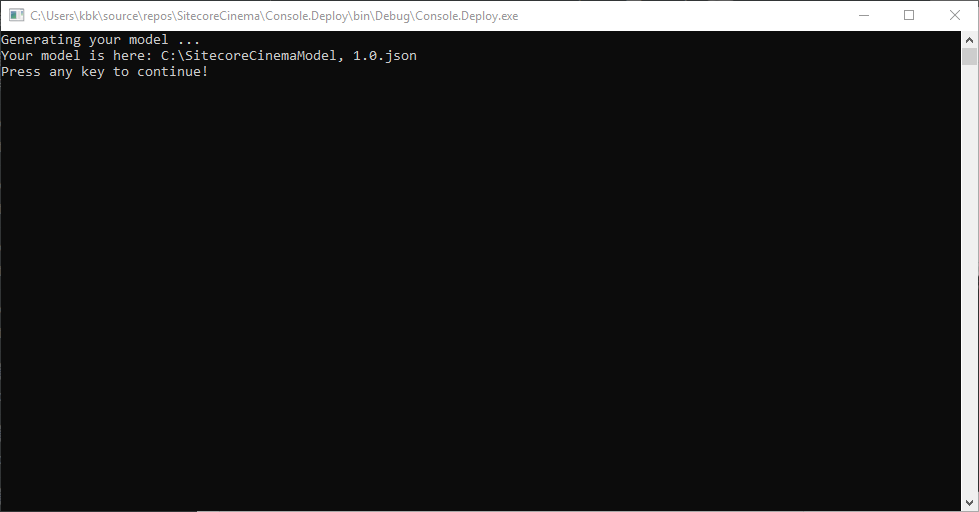
The serialized model in the
C:\SitecoreCinemaModel, 1.0.jsonfile must contain the following: -
Copy the
C:\SitecoreCinemaModel, 1.0.jsonfile to your<xConnect instance>\App_Data\Models\folder.
Create the Console.Journey console app project
The Console.Journey console app simulates a visitor's journey through a Sitecore Cinema:
- The visitor buys a movie ticket at the ticket machine.
- The visitor buys some candy at the concession stand.
- The visitor scans the movie ticket to enter the movie theater.
To create the Console.Journey console app project:
-
In Visual Studio with administrator privileges, right-click the
SitecoreCinemasolution and click Add, New Project to create a new console app project for .NET Framework calledConsole.Journey: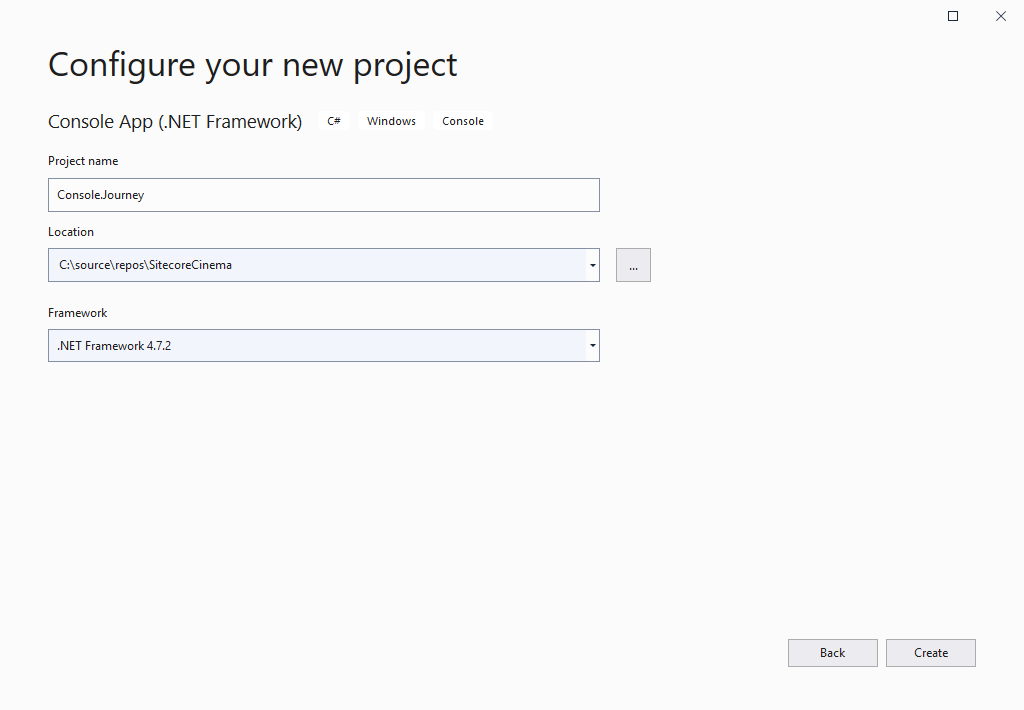
-
In Solution Explorer, right-click
Console.Journey/Referencesand click Add Reference. -
In the Reference Manager window, on the Projects tab, select
SitecoreCinema. -
In the Reference Manager window, click Browse and add the following references from your
<xConnect instance>\bin\folder:Sitecore.XConnect.Client.dllSitecore.XConnect.Collection.Model.dllSitecore.XConnect.Core.dllSitecore.XConnect.dllSitecore.Xdb.Common.Web.dll
-
Click OK.
-
In Solution Explorer, right-click References and click Manage NuGet Packages.
-
In the NuGet window, click Browse and add the following references:
Microsoft.Extensions.Configuration.AbstractionsSystem.Interactive.Async.Providers
-
In Solution Explorer, double-click the
Console.Journey/Program.csfile. -
In the
Program.csfile, replace the content with the following code: -
Edit the
CERTIFICATE_THUMBPRINTand theXCONNECT_URLconstants. -
Save the
Program.csfile.
Simulate a Sitecore Cinema visit
To simulate a Sitecore Cinema visit:
-
In Visual Studio with administrator privileges, in Solution Explorer, right-click the
Console.Journeyproject and click Set as Startup Project. -
Click Start to run the
Console.Journeyapp and wait for it to:- Register your first name.
- Register your second name.
- Register your favorite movie.
- Simulate buying a movie ticket.
- Simulate buying candy.
- Simulate entering the movie theater.
- Show the collected contact information and interactions.